Disclaimer
- This method is not officially supported. Furthermore, only ESXi packages prior to ESXi-6.0.0-20170604001 can be used. Even for learning purposes, this is somewhat limited, as it involves code nearly 10 years old.
In versions released after this build, VMware disabled the
net-tulipnetwork card driver that we rely on. -
This process is very time-consuming and potentially fruitless. You will likely encounter various unpredictable issues. Ensure you have the patience and ability to troubleshoot them.
Overview Diagram

Prerequisites
- An ESXi depot package (Note: Because we need to install our custom driver, only the depot package can be used, not the ISO). I am using the HPE Custom packaged ESXi 2017.02 depot package. You can download it here.

-
The
net-tulipVIB driver. The source is here. You can download it here. -
PowerCLI (ver: 12.7.0). I initially downloaded the latest PowerCLI 13, but later encountered tool compatibility issues and switched to PowerCLI 12. You can install it directly via PowerShell or download it for offline installation.
Install via PowerShell command line:
Install-Module -Name VMware.PowerCLI -RequiredVersion 12.7.0.20091289 -Scope CurrentUser -AllowClobber -ForceOffline Installation:
Download PowerCLI from the Broadcom official website.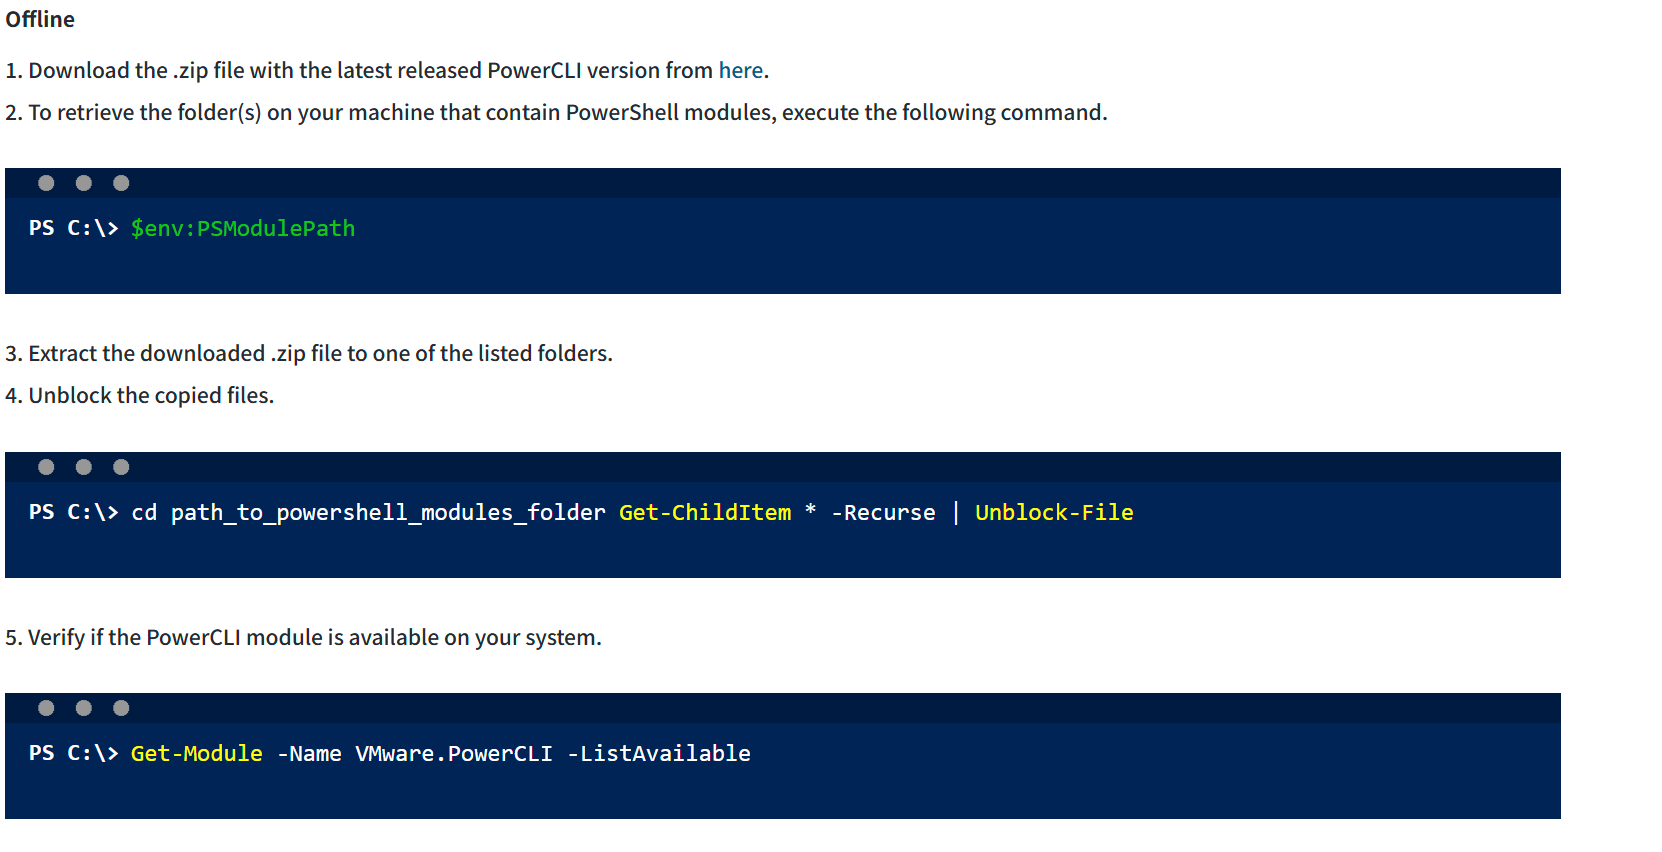
-
ESXi-Customizer-PS.ps1 is used to build the required
net-tulipnetwork card driver into the ESXi ISO. Otherwise, you will encounter errors about unrecognized network cards.
Building the ESXi Installation Package
After completing all preparations, your directory should look like this:
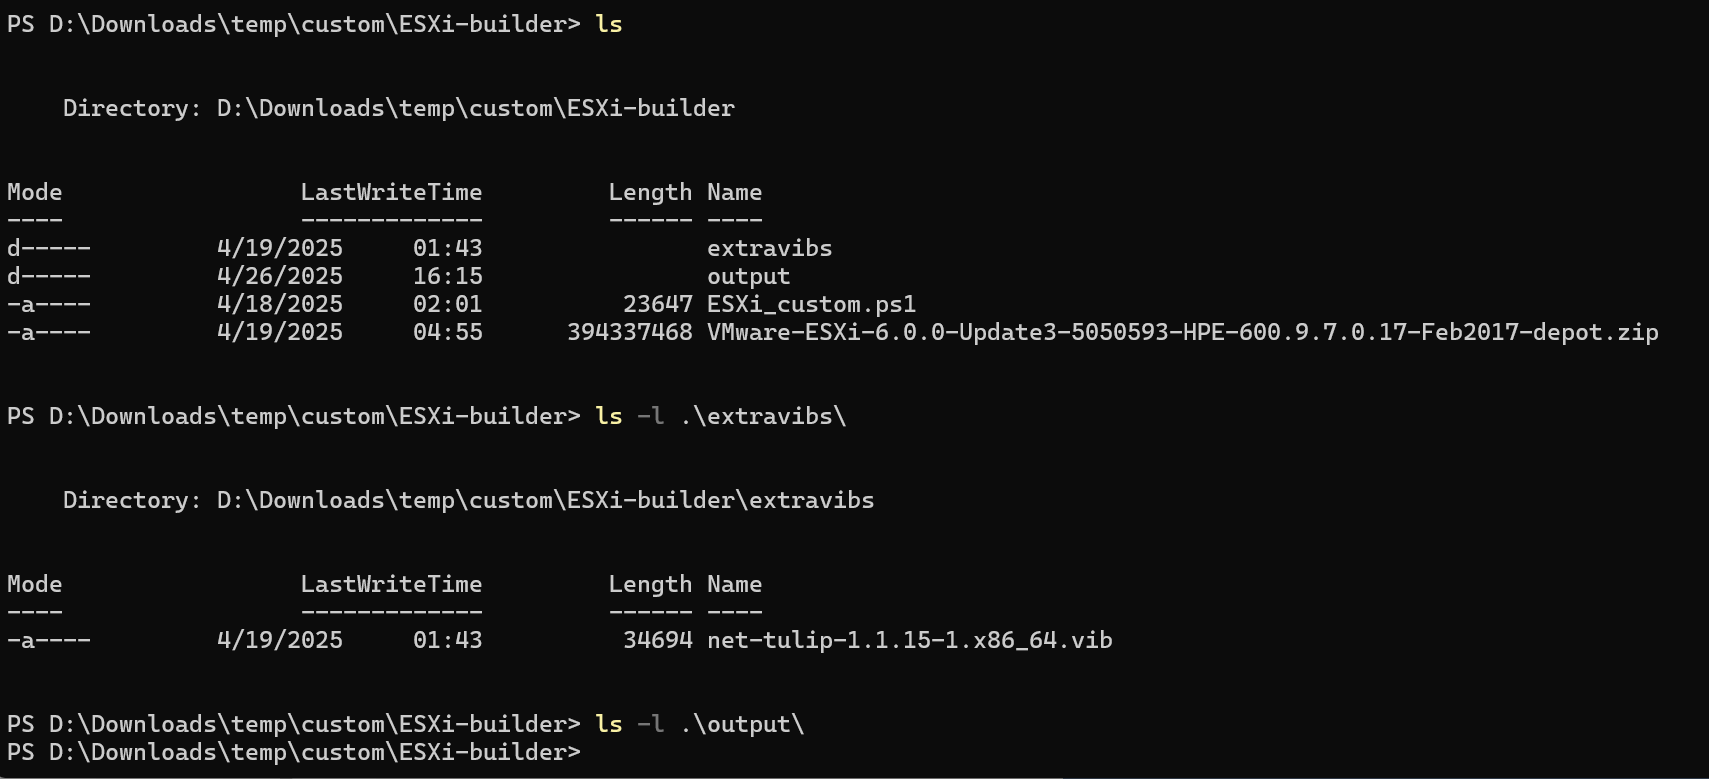
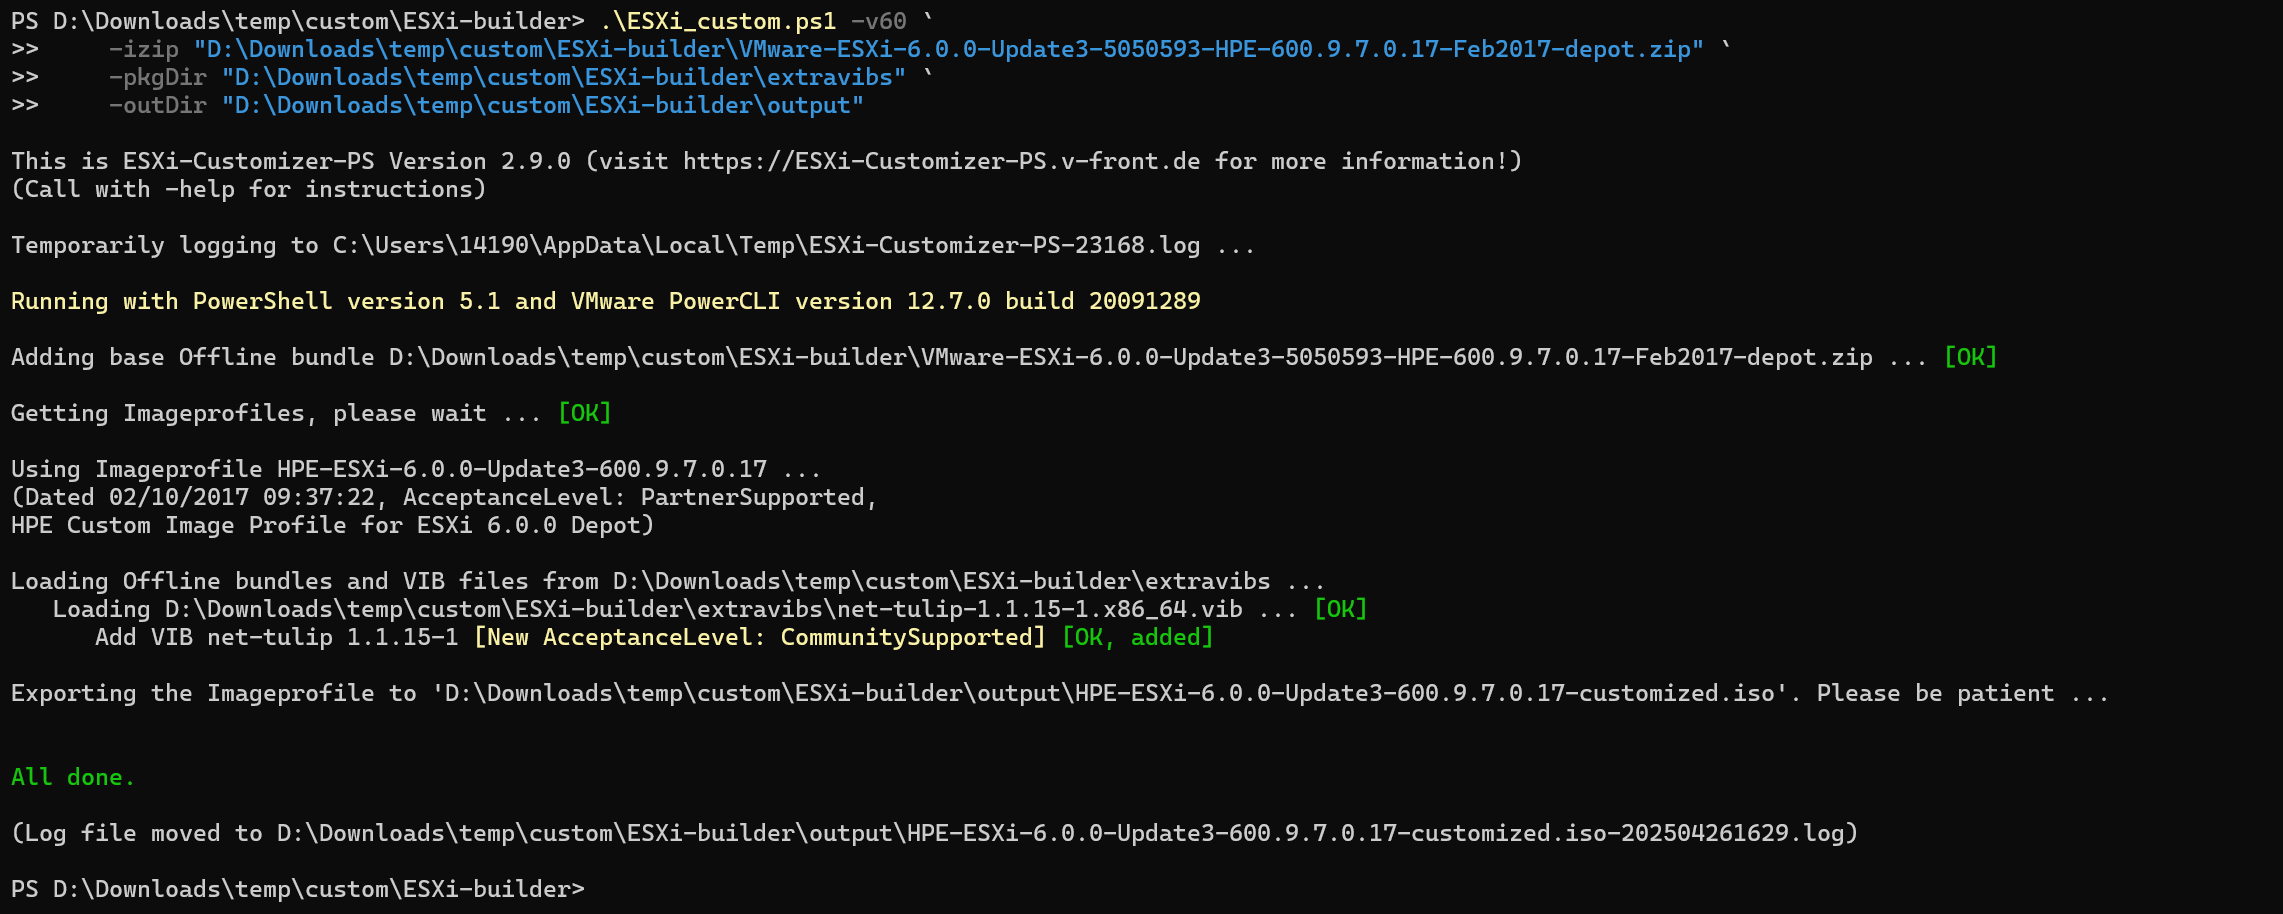
Execute ESXi_custom.ps1 to package the net-tulip driver into the VMware-ESXI-6.0.0 image:
PS D:\Downloads\temp\custom\ESXi-builder> .\ESXi_custom.ps1 -v60 `
    -izip "D:\Downloads\temp\custom\ESXi-builder\VMware-ESXi-6.0.0-Update3-5050593-HPE-600.9.7.0.17-Feb2017-depot.zip" `
    -pkgDir "D:\Downloads\temp\custom\ESXi-builder\extravibs" `
    -outDir "D:\Downloads\temp\custom\ESXi-builder\output"
Afterward, you can find the packaged ISO in the output directory.

Installing ESXi
The process here is largely similar to this article. It’s recommended to refer to the original; I will outline the key points here.
Create New Virtual Machine
Note: When creating a new VM in Hyper-V, you must select Generation 1. This is because only Generation 1 VMs support the Legacy Network Adapter, which is necessary to use the net-tulip driver we just packaged.

For Installation Options, select the ISO we just packaged.

Other settings can remain default.

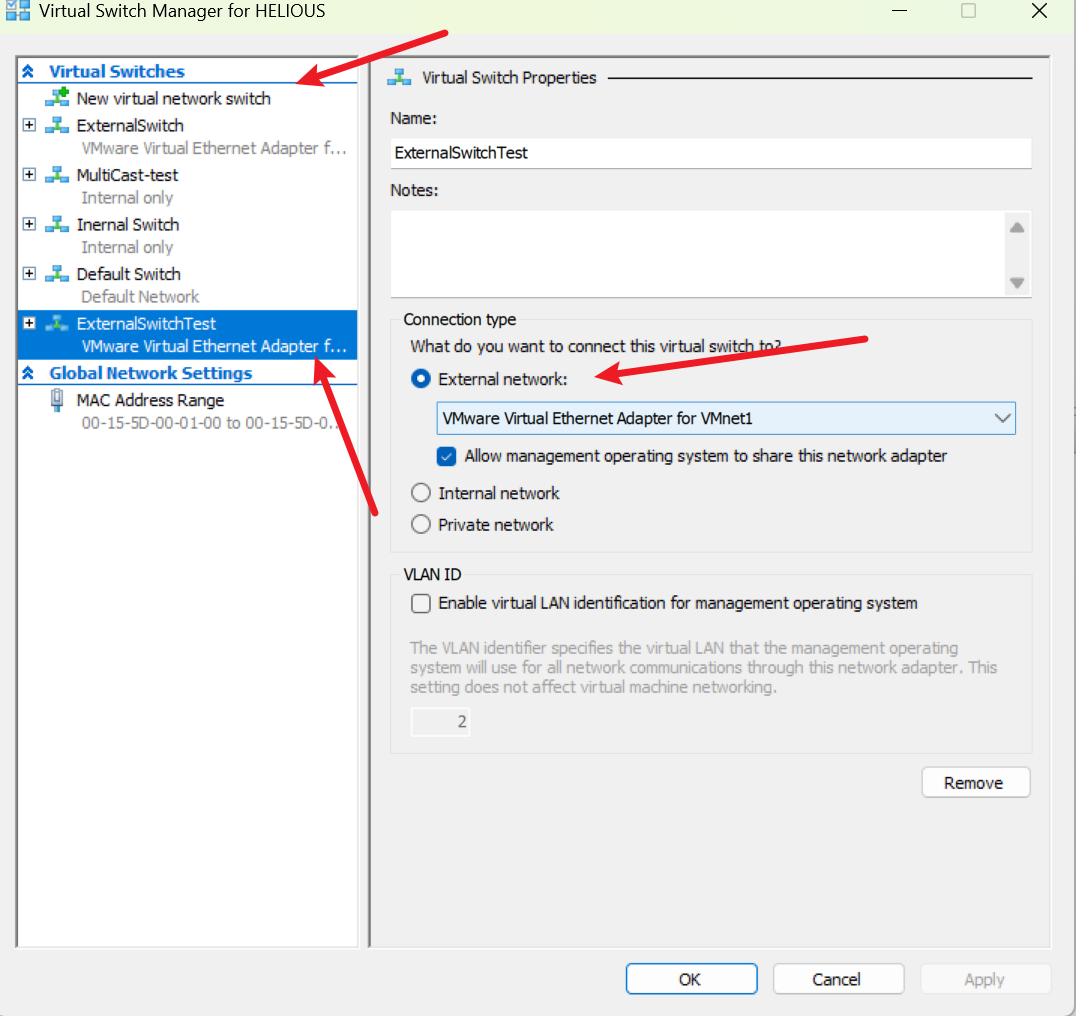
Configure Network Adapter
Here, you need to select an External Switch. I chose the virtual network adapter created by VMware Workstation for my External Switch.

Then, enable nested virtualization for this VM.
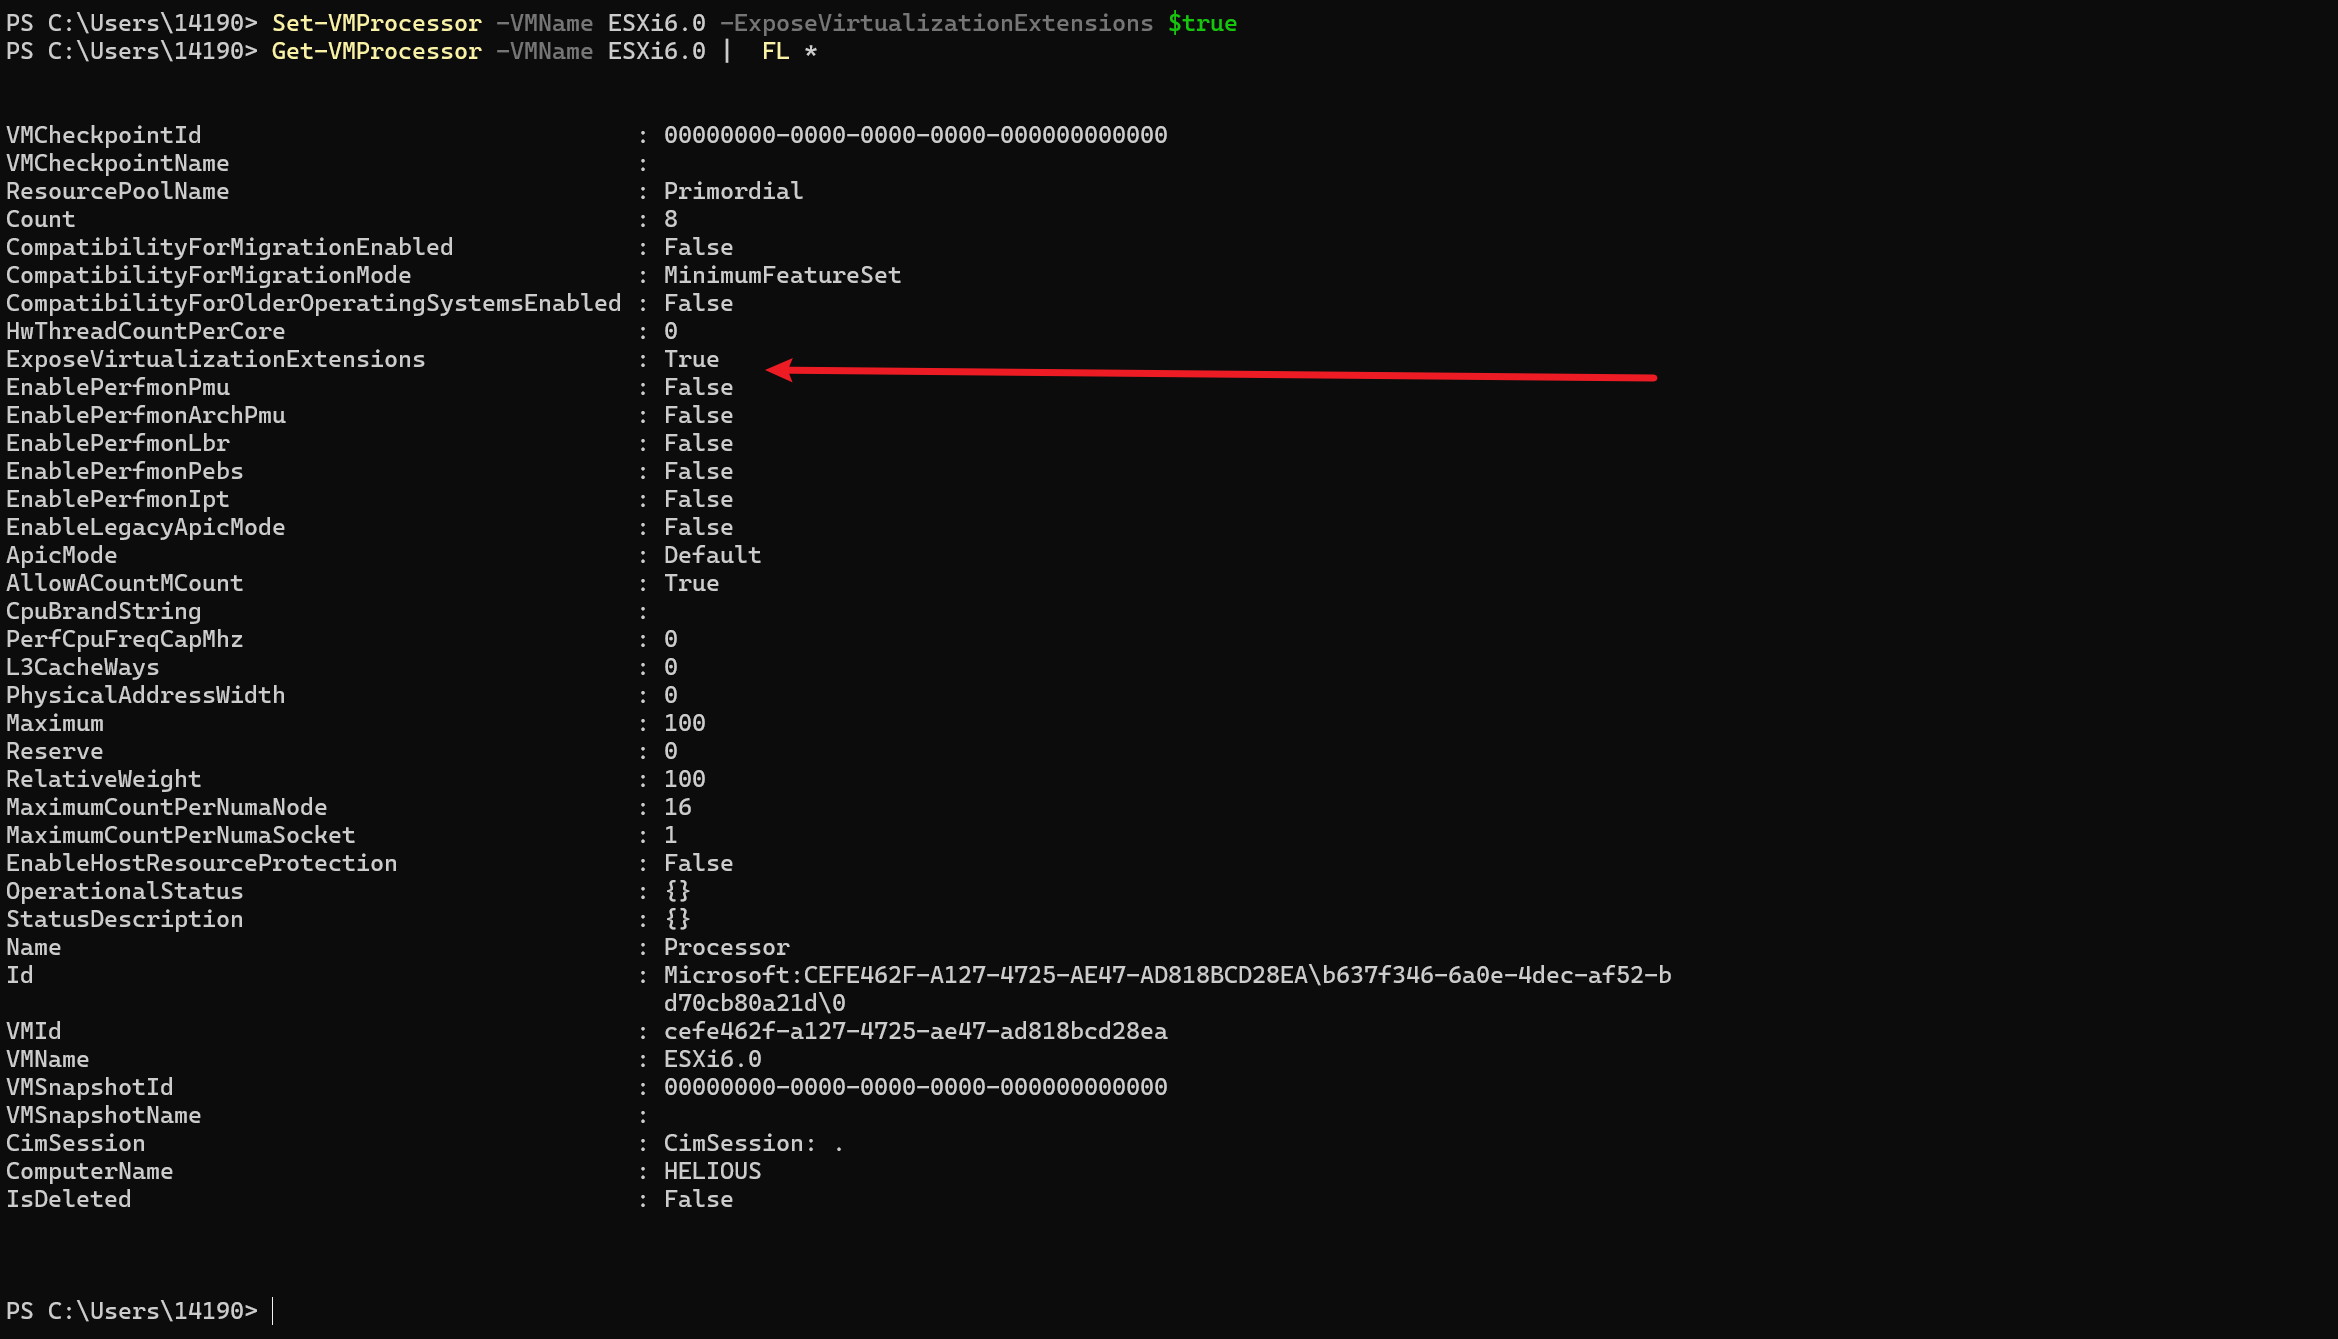
During boot, press the Tab key and add ignoreHeadless=True.

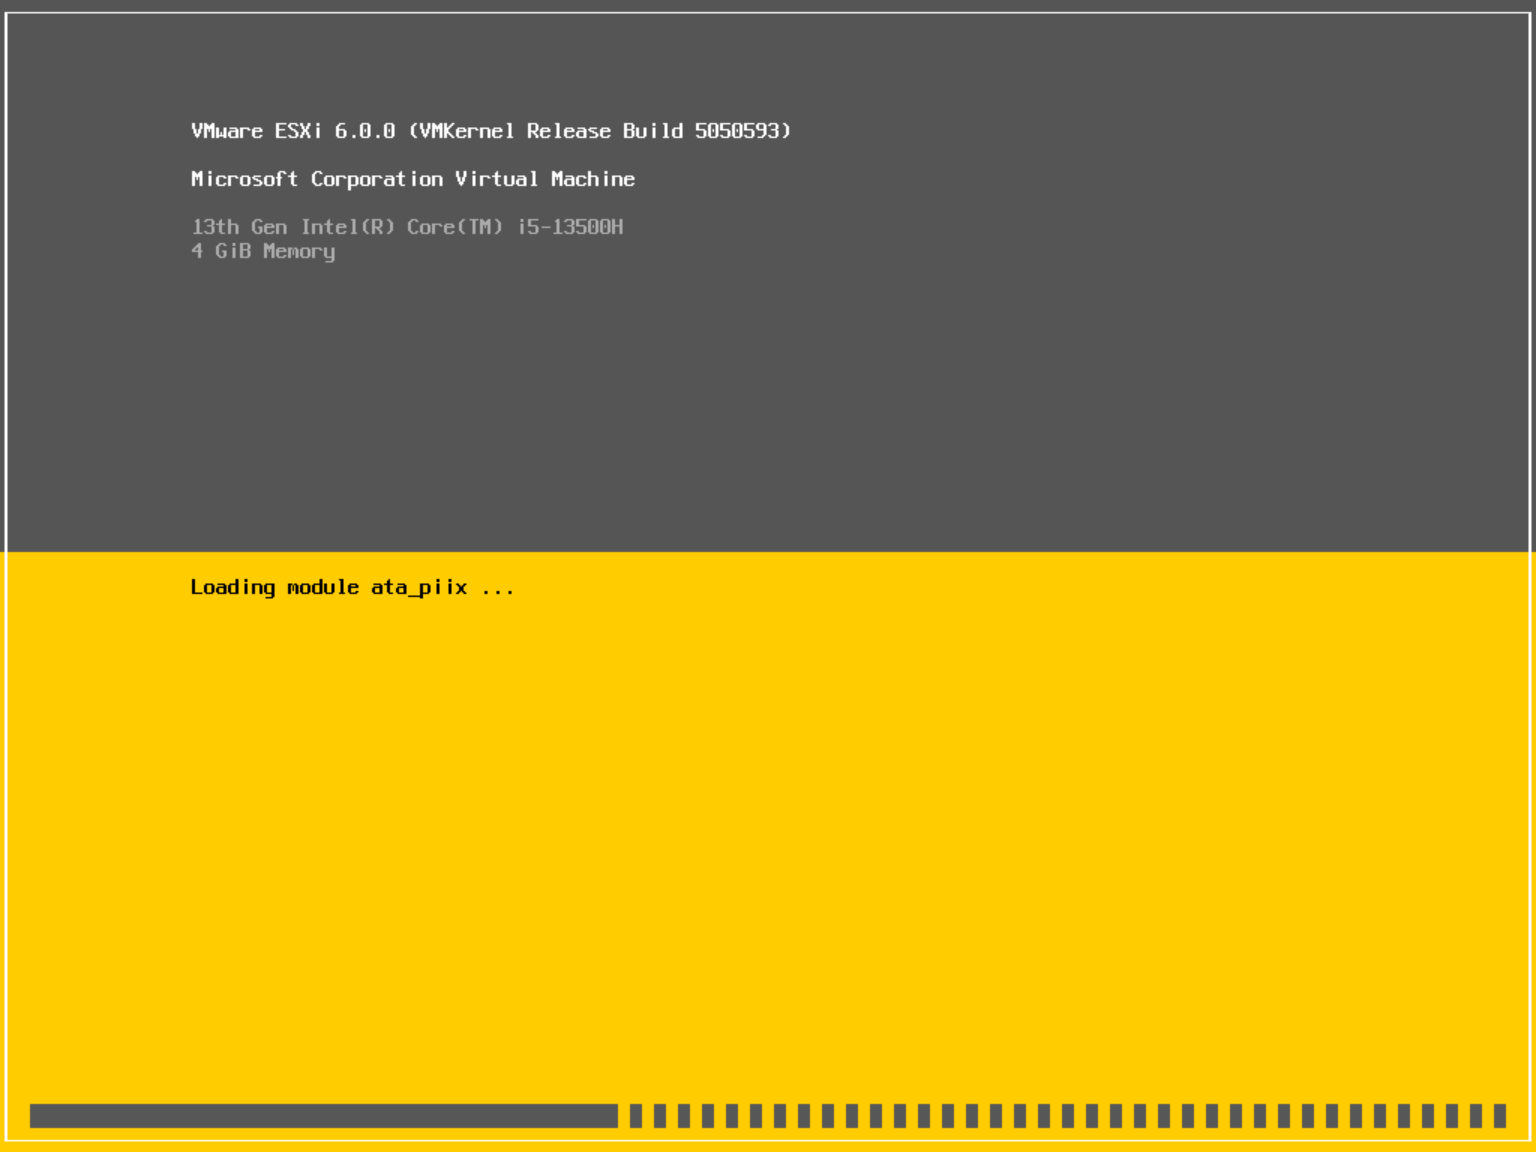
Then, wait for the initialization to complete.
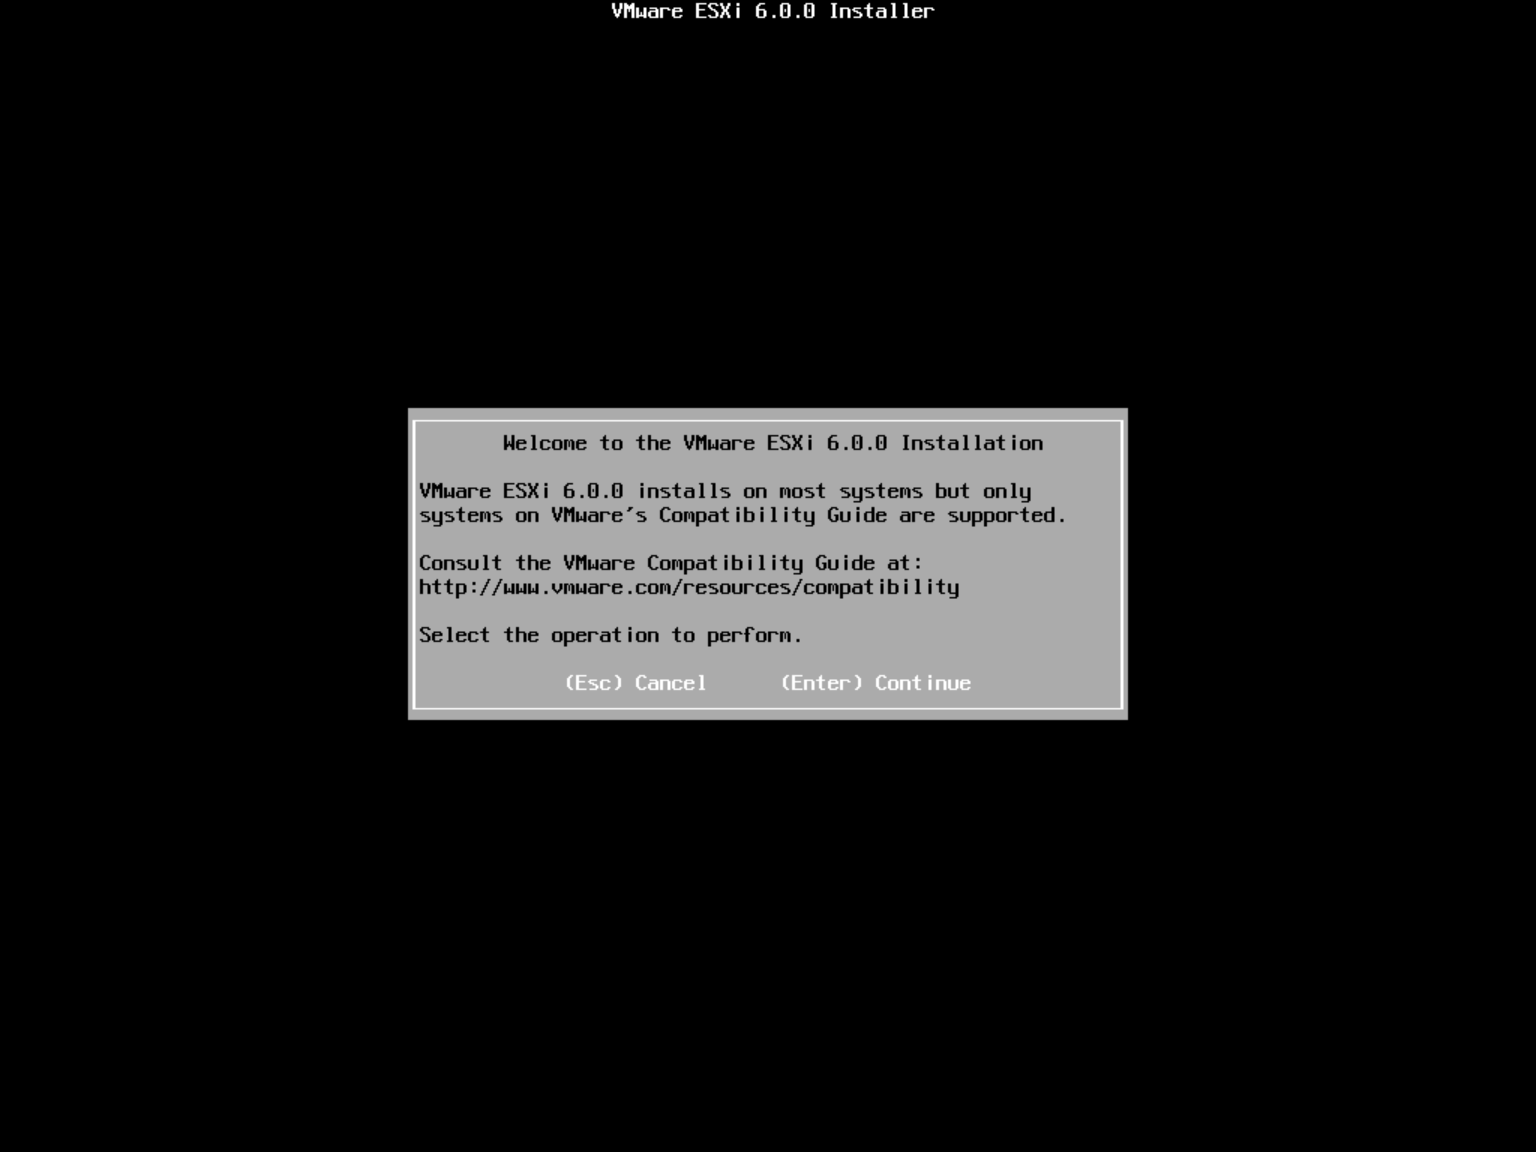
After initialization, follow the on-screen instructions to continue the installation. Pay attention to the key prompts.

Once the installation is finished, reboot the VM.

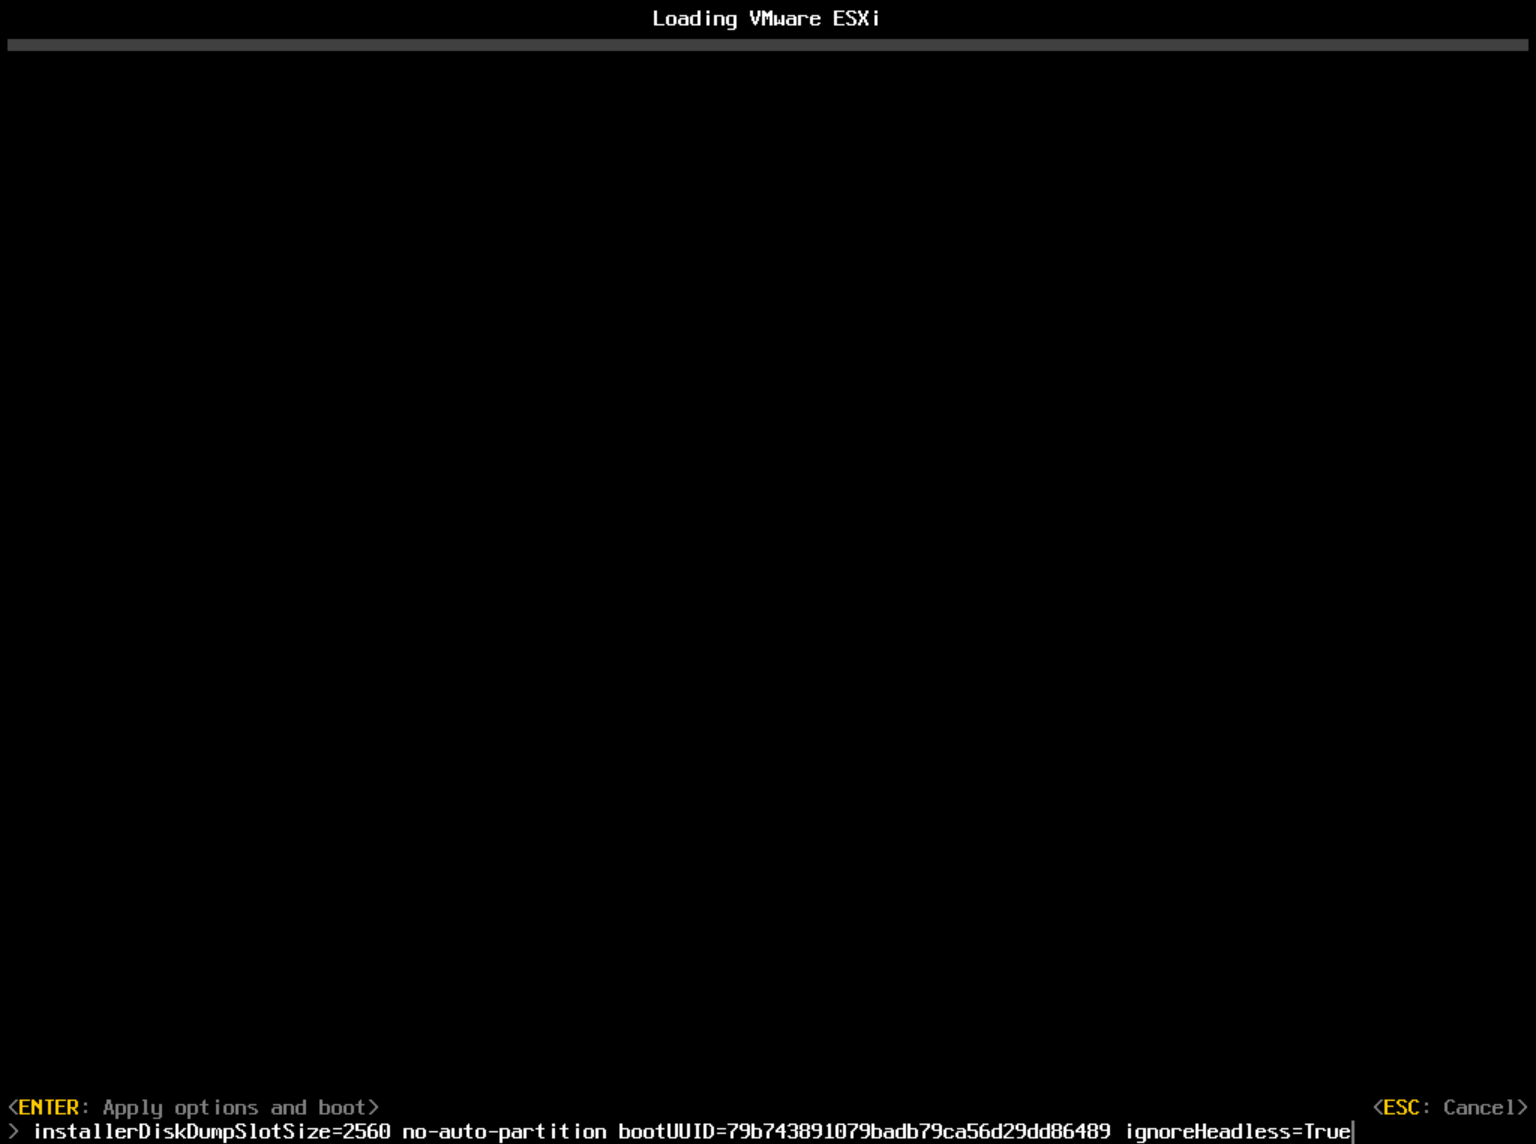
During the reboot, press Shift + O and again add ignoreHeadless=True.
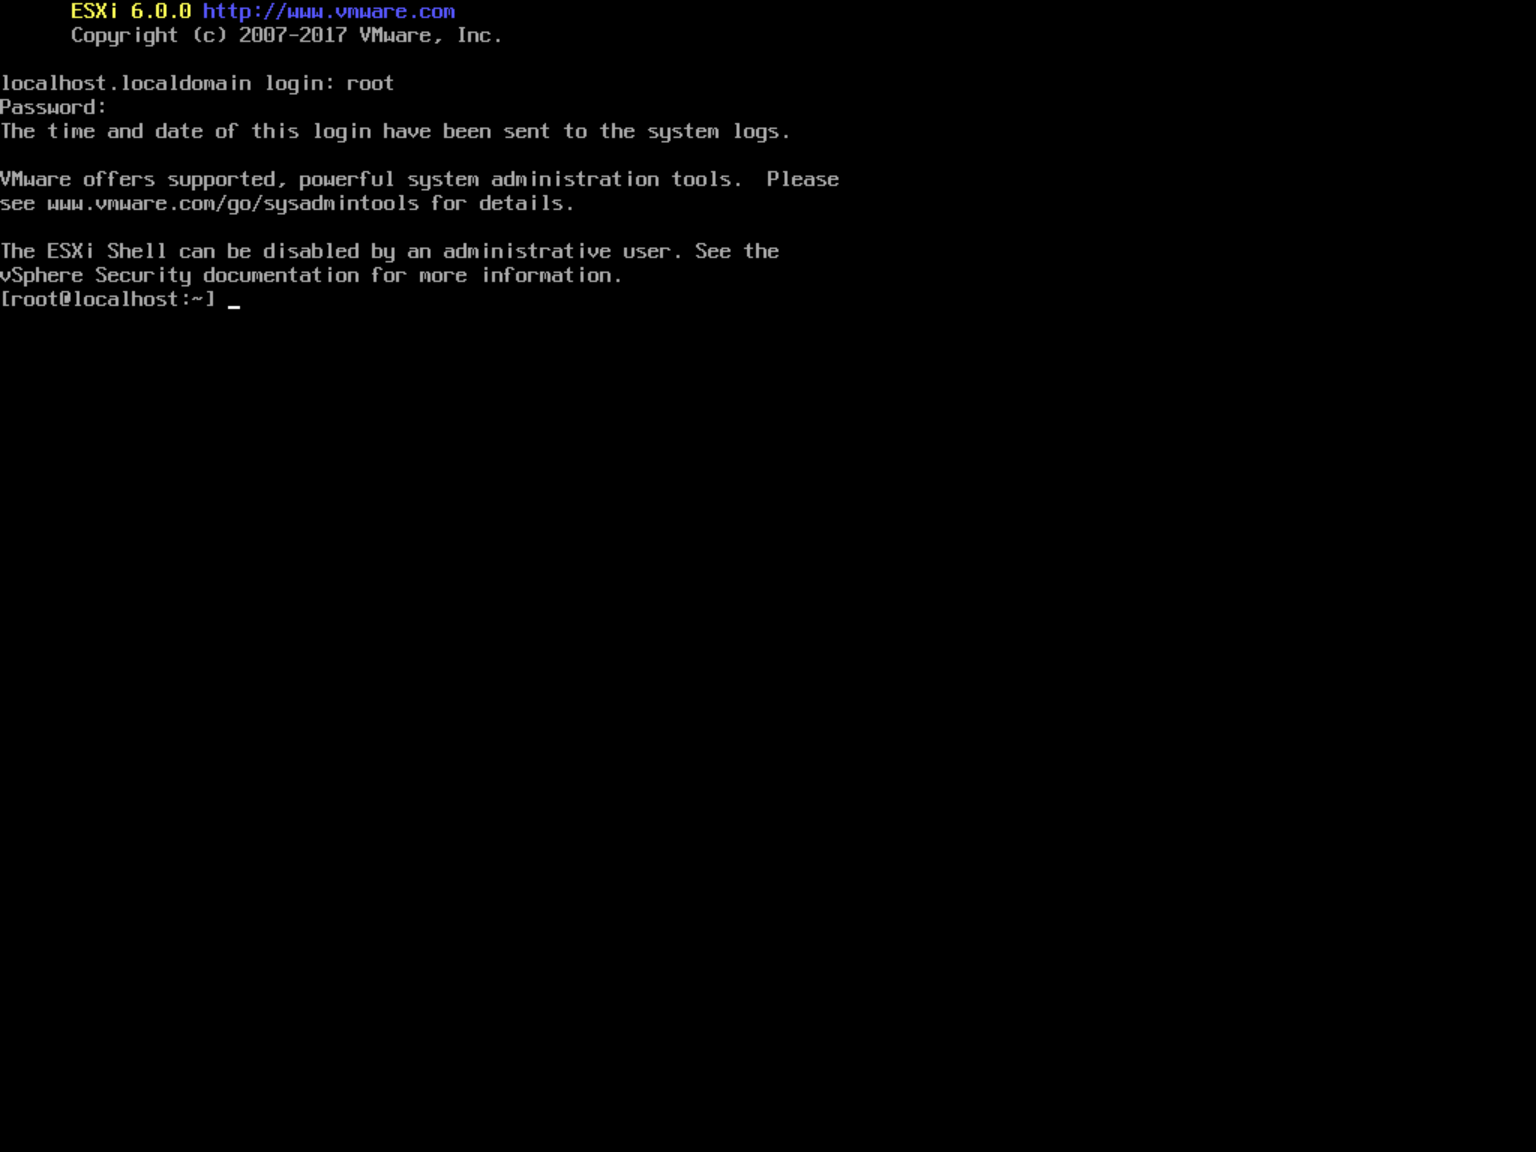
You should then reach this screen:

Press F2 to enter the console configuration.

Enter the password and press F2 again.

Go to Troubleshooting Mode Options and enable SSH and the ESXi Shell.


Back on the main console screen, press ALT+F1 to enter the shell.
Set the kernel boot parameter permanently so you don’t have to add it manually each time:
esxcfg-advcfg -k TRUE ignoreHeadless

Accessing the Console
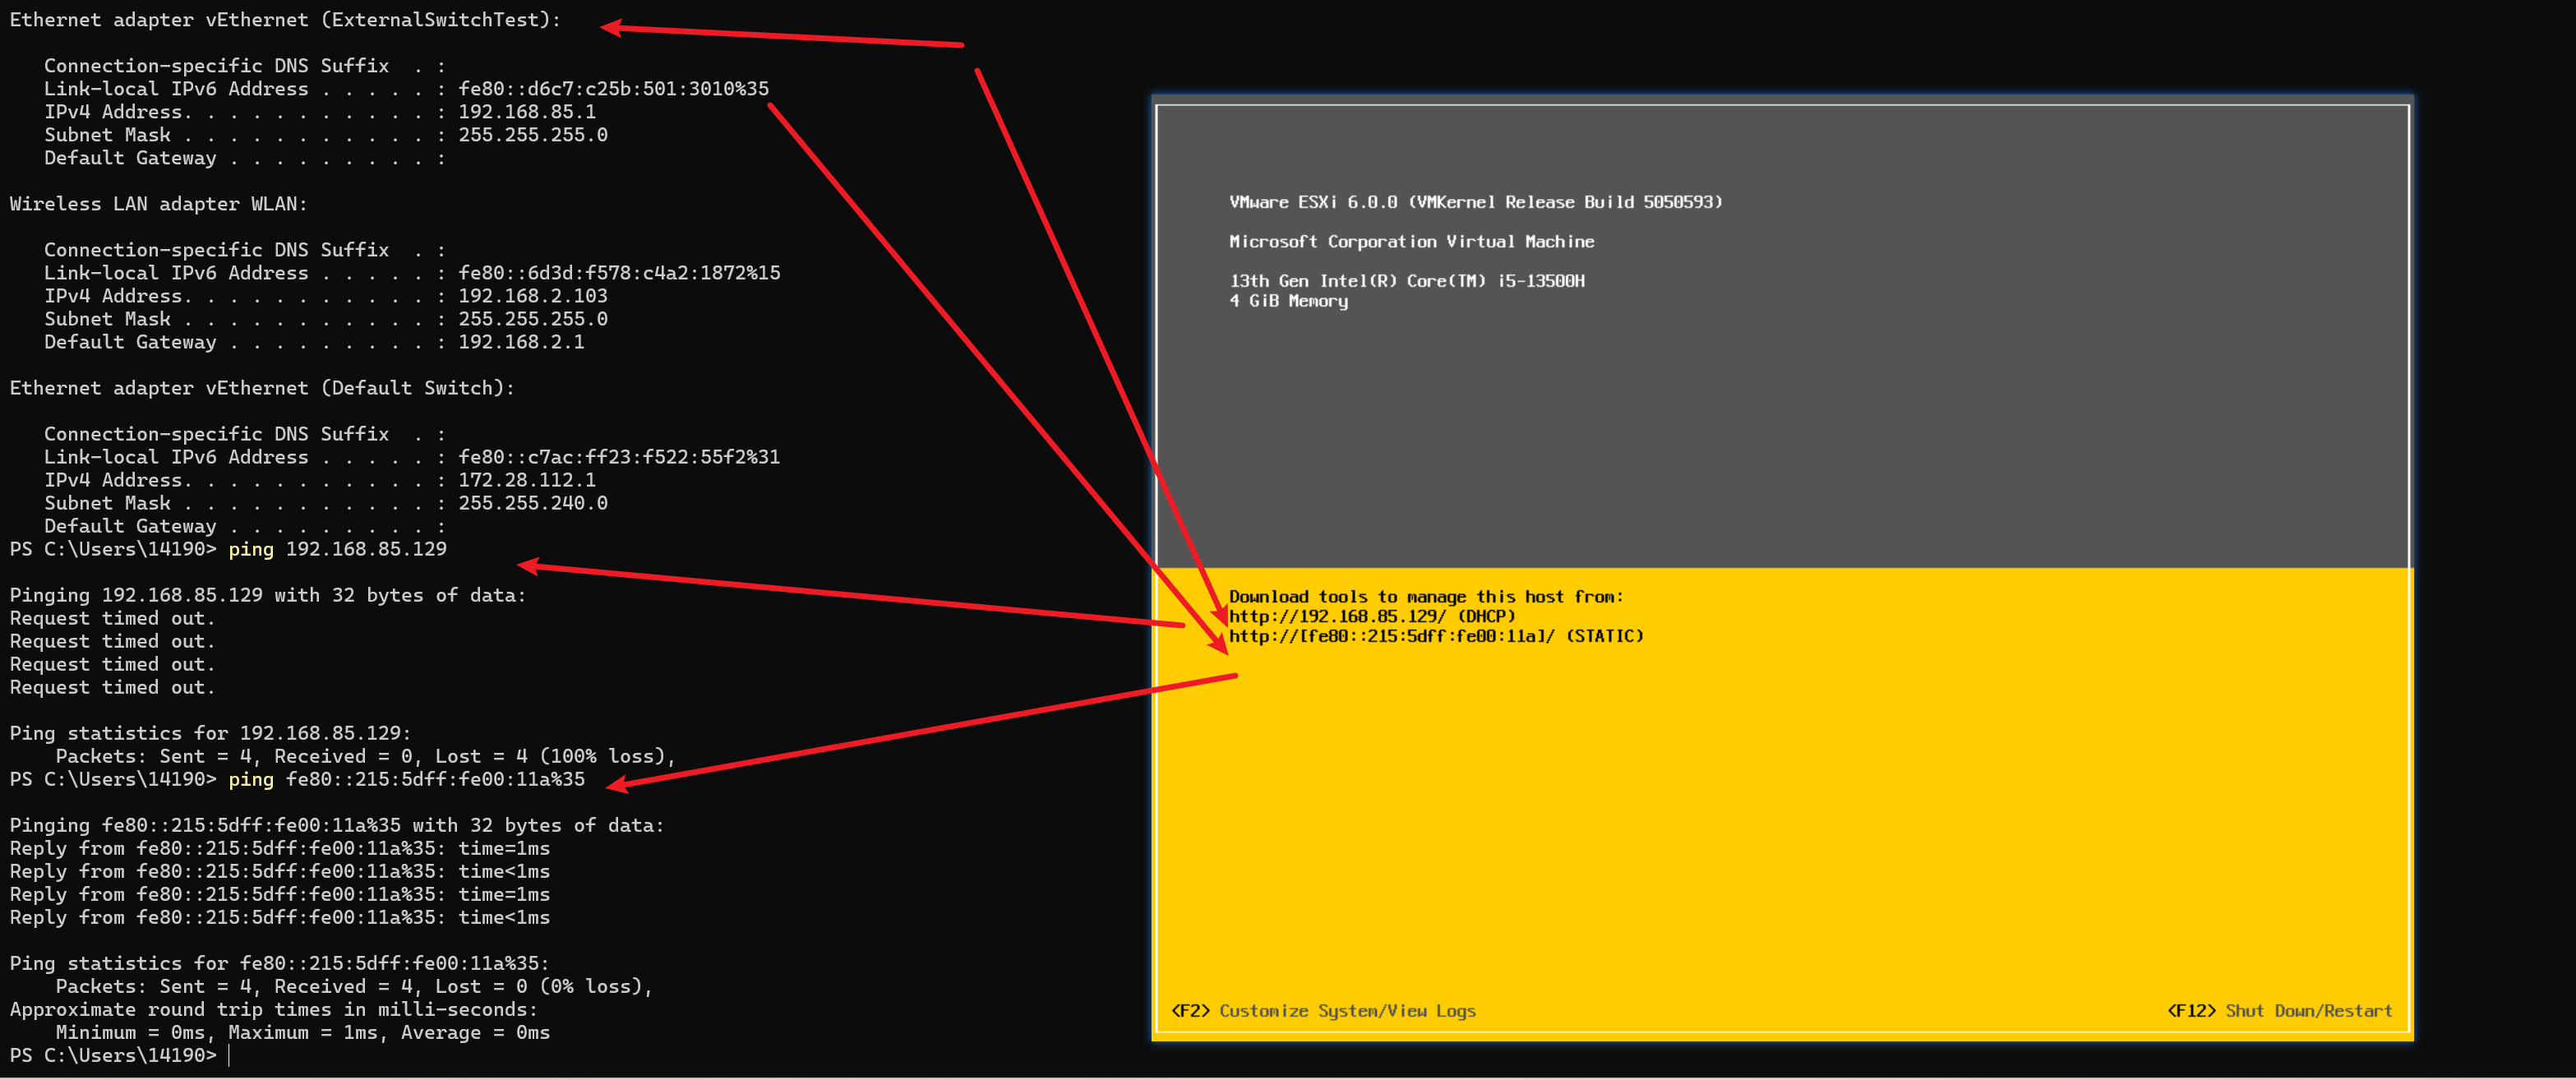
Access via IPv6 Link-Local Address
We can configure the network in the console, but in my case, the IPv4 address was never pingable (local packet capture showed ESXi could send ARP requests but not receive replies; the exact reason wasn’t determined). However, the IPv6 address was pingable, so let’s use IPv6 for access.
Note: IP addresses starting with fe80:: are link-local addresses. Most browsers currently do not support resolving these addresses directly, so we cannot directly access the vSphere Web Client using them.
However, according to the method described here, we can use a proxy to translate the address into a domain name that browsers can resolve.
The prettysocks SOCKS5 proxy (update 2021-11-24)
On 2021-11-23 we have been notified that there is a new workaround available: prettysock is a Socks5 proxy written in python that allows the use of Microsoft’s ipv6-literal.net domain, but from any OS or browser, which is pointed to the proxy. So to access fe80::1ff:fe23:4567:890a%3, configure your browser to use the local prettysocks Socks5 proxy, replace the link local address with fe80–1ff-fe23-4567-890as3.ipv6-literal.net and there you go.
There are two interesting things to say about this solution:
- It is a very simple solution
- It is surprising that browser vendors haven’t implement such a simple solution themselves so far – does it need an RFC that defines the domain to be used?
Explanation translated by GPT:

(Translation: The core idea is that browsers don’t support directly accessing IPv6 link-local addresses (like fe80::…). This prettysocks tool acts as a SOCKS5 proxy. You configure your browser to use this proxy. When you want to access fe80::...%zone_id, you instead navigate to a specially formatted domain like fe80--...s<zone_id>.ipv6-literal.net. The prettysocks proxy intercepts this request, translates the domain back into the original link-local IPv6 address, and then connects to the target host using that IPv6 address. This effectively bypasses the browser’s limitation.)
OK, following the method above, we set up rules in the browser extension SwitchyOmega Proxy:


Note the URL in the address bar:

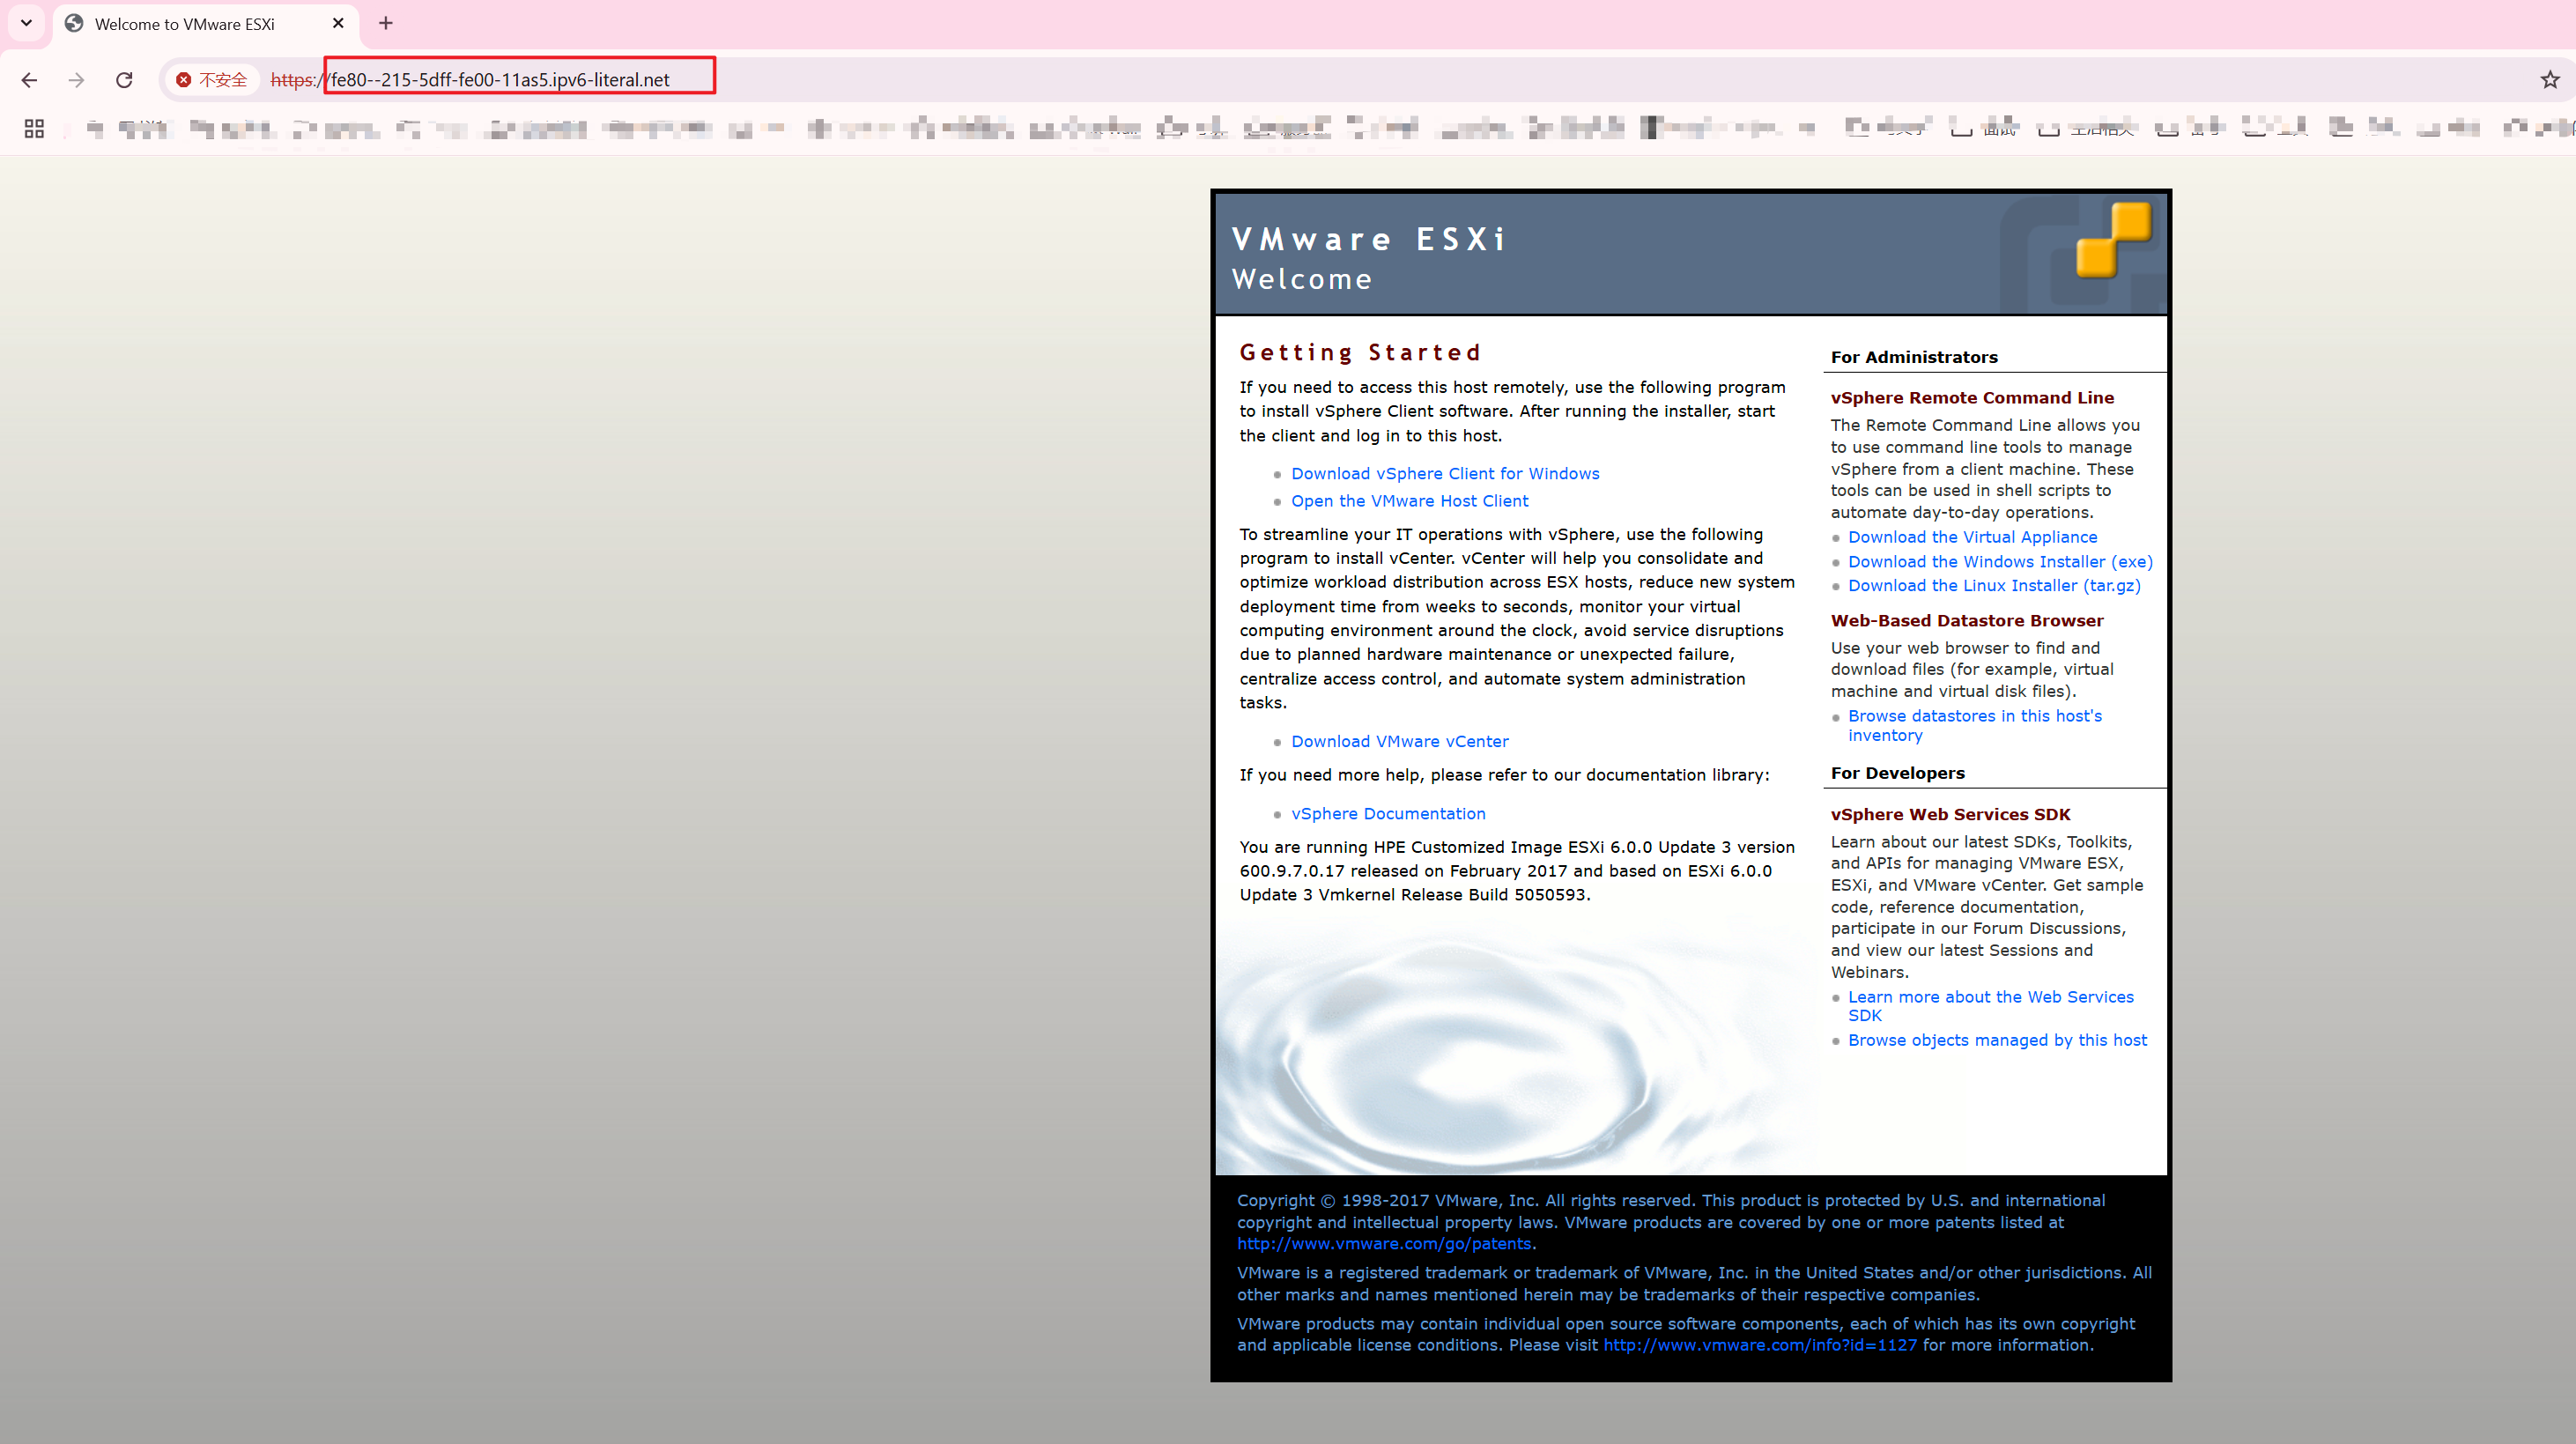

However, the vSphere Client can resolve IPv6 link-local addresses, so you can use the vSphere Client for management:

For some reason, I couldn’t log in with the vSphere Client until after I had successfully accessed the web UI and installed the certificate. After accessing the web UI, the vSphere Client also worked.
However, the vSphere Client has been effectively deprecated since version 6.5 and lacks the features of the Web Client. You should ideally use either vCenter Server or the vSphere Web Client.
Access via ULA IPv6 Address obtained from DHCPv6
If you prefer a less complex setup and don’t want to deal with the proxy, you can enable DHCPv6 and autoconfiguration in the ESXi shell. This allows ESXi to obtain a Unique Local Address (ULA) IPv6 address automatically from a DHCPv6 server on your network. You can then use this ULA address directly for access, provided your External Switch environment has DHCPv6 capabilities.
Coincidentally, the virtual network adapter created by VMware Workstation in NAT mode can assign IPv6 addresses:

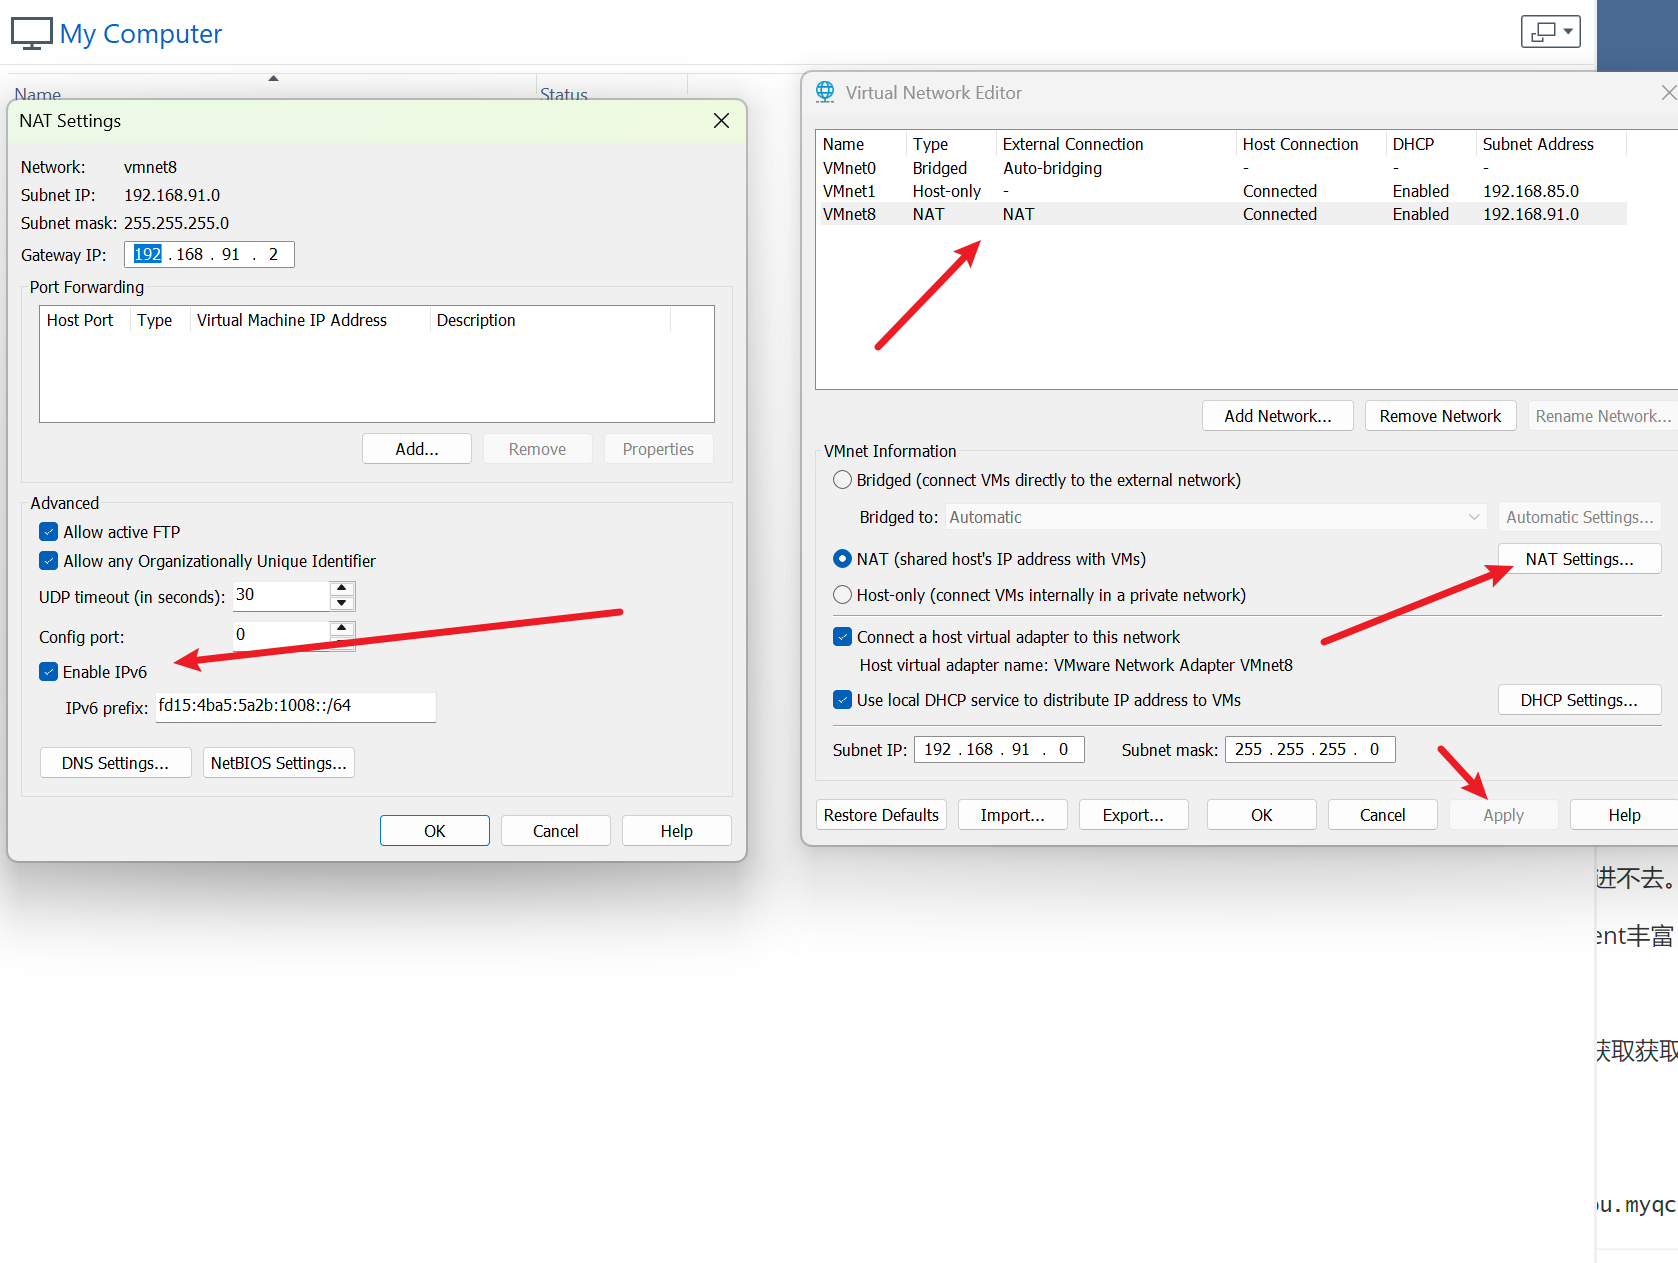
Then, we go into the ESXi shell to enable DHCPv6 and router advertisements for the management interface (vmk0):
esxcli network ip interface ipv6 set -i vmk0 --enable-dhcpv6=true --enable-router-adv=true
Accessing the web console again (perhaps still via the proxy initially to check), we can see that after enabling these options, an IPv6 address (likely a ULA starting with fdxx:) has been automatically assigned:

Now let’s try accessing the web client using this ULA address directly.
Note: IPv6 addresses in URLs must be enclosed in square brackets: http://[your_ipv6_address]

OK, that concludes this setup.
Activate License
If you’ve managed to get through the previous steps, this issue shouldn’t pose a major challenge…
Install vCenter Server
TODO
Postscript
The main reason for tackling this was that I was recently reading the book “vSphere 6.5 Host Resources Deep Dive” and felt that reading without a hands-on environment was like building castles in the air. It took about a week, off and on, to get this working.
The most frustrating part was discovering that the IPv4 address was completely unreachable. ARP replies sent from the host seemed to get lost once they entered the ESXi VM. There’s definitely a bug somewhere.
However, my goal was simply to be able to use ESXi. Since I could eventually access it via IPv6, I decided not to spend more time investigating the IPv4 issue (I probably wouldn’t have been able to figure it out anyway).
I discovered the possibility of using IPv6 from a hint here:
- AFAIK, The only working network switch is the
external switch, which will not allow host to vm connections when you only have one nic. See https://serverfault.com/questions/984241/hyper-v-connecting-to-host-to-vm-w-external-switch. But you can access your esxi vm viaIPv6instead in that case.
Also, the reason we are limited to ESXi 6.0 and earlier versions is that the net-tulip network driver was disabled in later versions (after the June 2017 update).
If you purchased an ESXi-compatible network card, you could potentially use Hyper-V’s Passthrough capabilities to pass the physical NIC directly to the ESXi VM, avoiding all these driver and networking issues. However, I don’t have the time to explore that at the moment.
Reference Links
- https://github.com/sinloss/ESXiV
- https://www.nakivo.com/blog/install-esxi-hyper-v/
- https://vibsdepot.v-front.de/wiki/index.php/Net-tulip
- https://github.com/VFrontDe-Org/ESXi-Customizer-PS
- https://within592.rssing.com/chan-21128804/latest.php
- https://mirror.mahanserver.net/?dir=VMware/ESXI/6.0.0
- https://staticcms.k8s.ungleich.ch/u/blog/ipv6-link-local-support-in-browsers/
- https://web.archive.org/web/20190707131225/https://communities.vmware.com/thread/427502
- https://frankdenneman.nl/2017/11/07/free-vsphere-6-5-host-resources-deep-dive-ebook/
- https://dscottraynsford.wordpress.com/2016/04/22/install-a-vmware-esxi-6-0-hypervisor-in-a-hyper-v-vm/comment-page-2/