声明
- 官方不支持这种用法。以及只能使用ESXi-6.0.0-20170604001以前的包,即使仅供学习,也有些勉强。毕竟是将近10年前的代码了。
在这之后的版本,vmware把我们依赖的net-tulip网卡给禁了
-
这样做太花时间,也可能没有意义,你会遇到各种乱七八糟的问题,你得确保自己有耐心和能力去解决这些问题
前置准备
-
ESXi的depot包(注意因为我们要安装我们的驱动,只能用depot包,不能用iso)我这里用的HPE Custom封装后ESXi 2017.02 的depot包, 可以点击下载

-
Powercli (ver: 12.7.0),刚开始下载的最新的powercli 13最新版,后面发现似乎工具的兼容性问题,换成powercli 12了。可以直接通过Powershell下载,或者离线下载
通过Powershell命令行安装
Install-Module -Name VMware.PowerCLI -RequiredVersion 12.7.0.20091289 -Scope CurrentUser -AllowClobber -Force离线安装
从Broadcom官网下载Powercli,
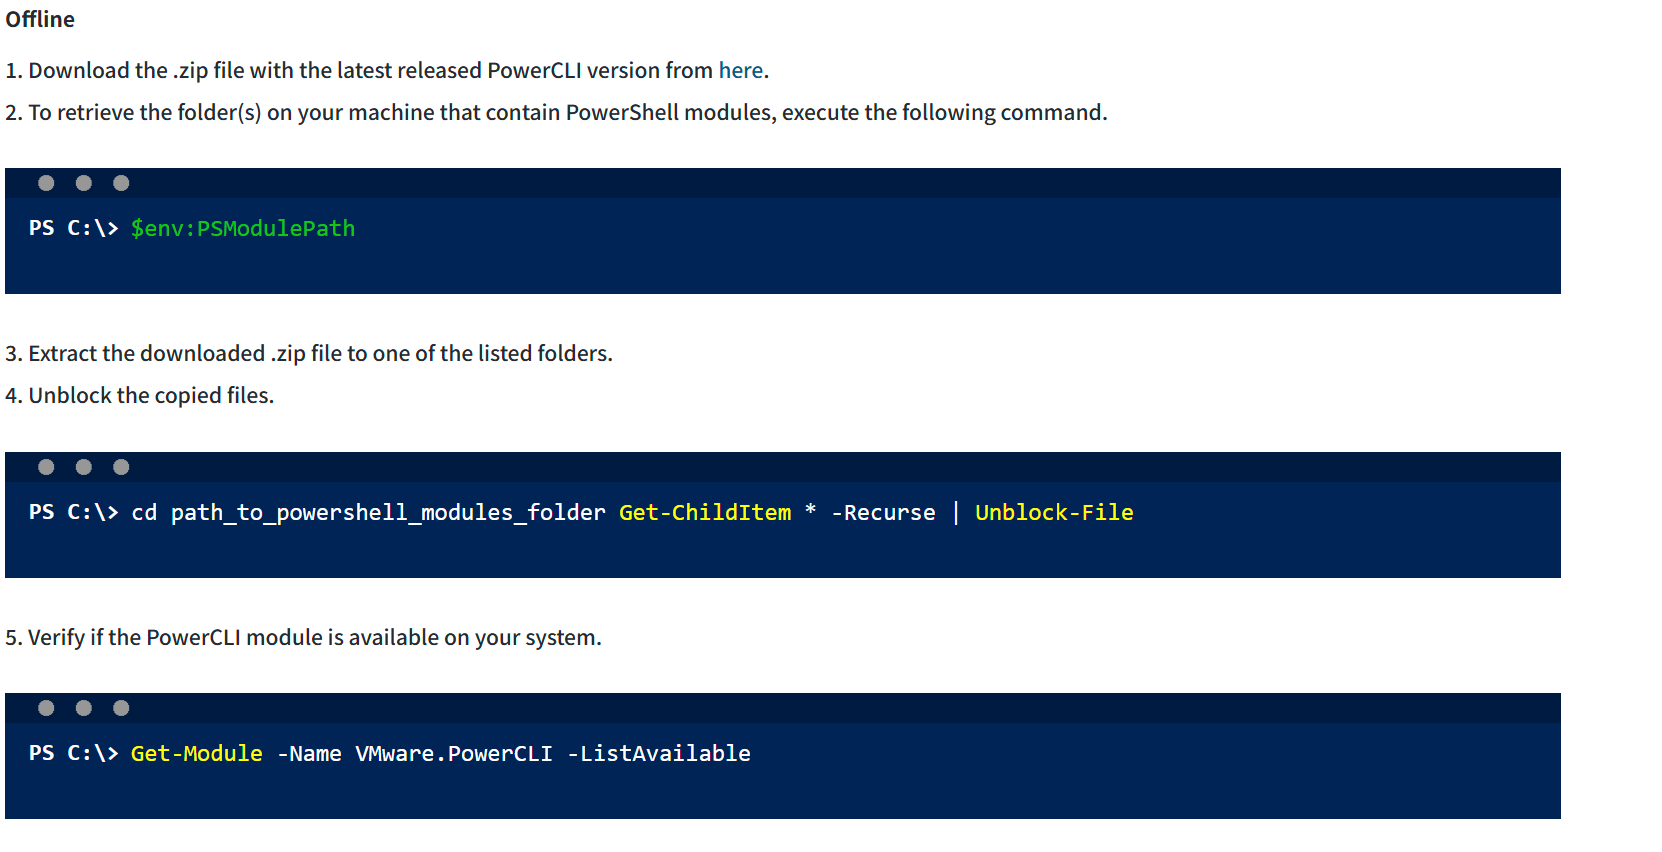
-
ESXi-Customizer-PS.ps1用来将依赖的网卡net-tulip驱动编进ESXi的iso中,否则会报错无法识别网卡
构建ESXi安装包
在一切准备就绪后的你的目录,现在应该是这样
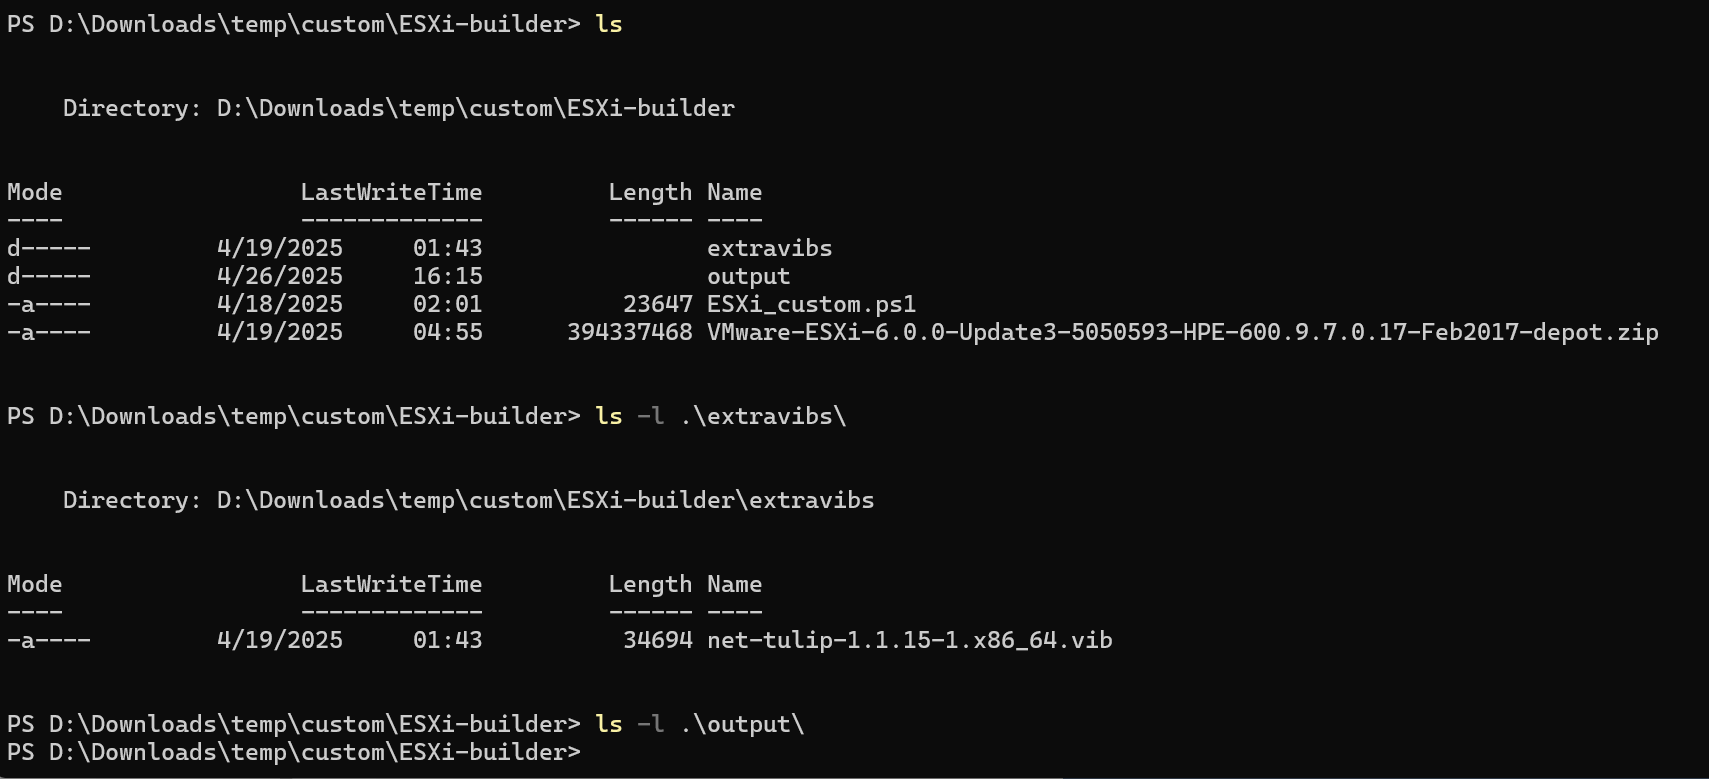
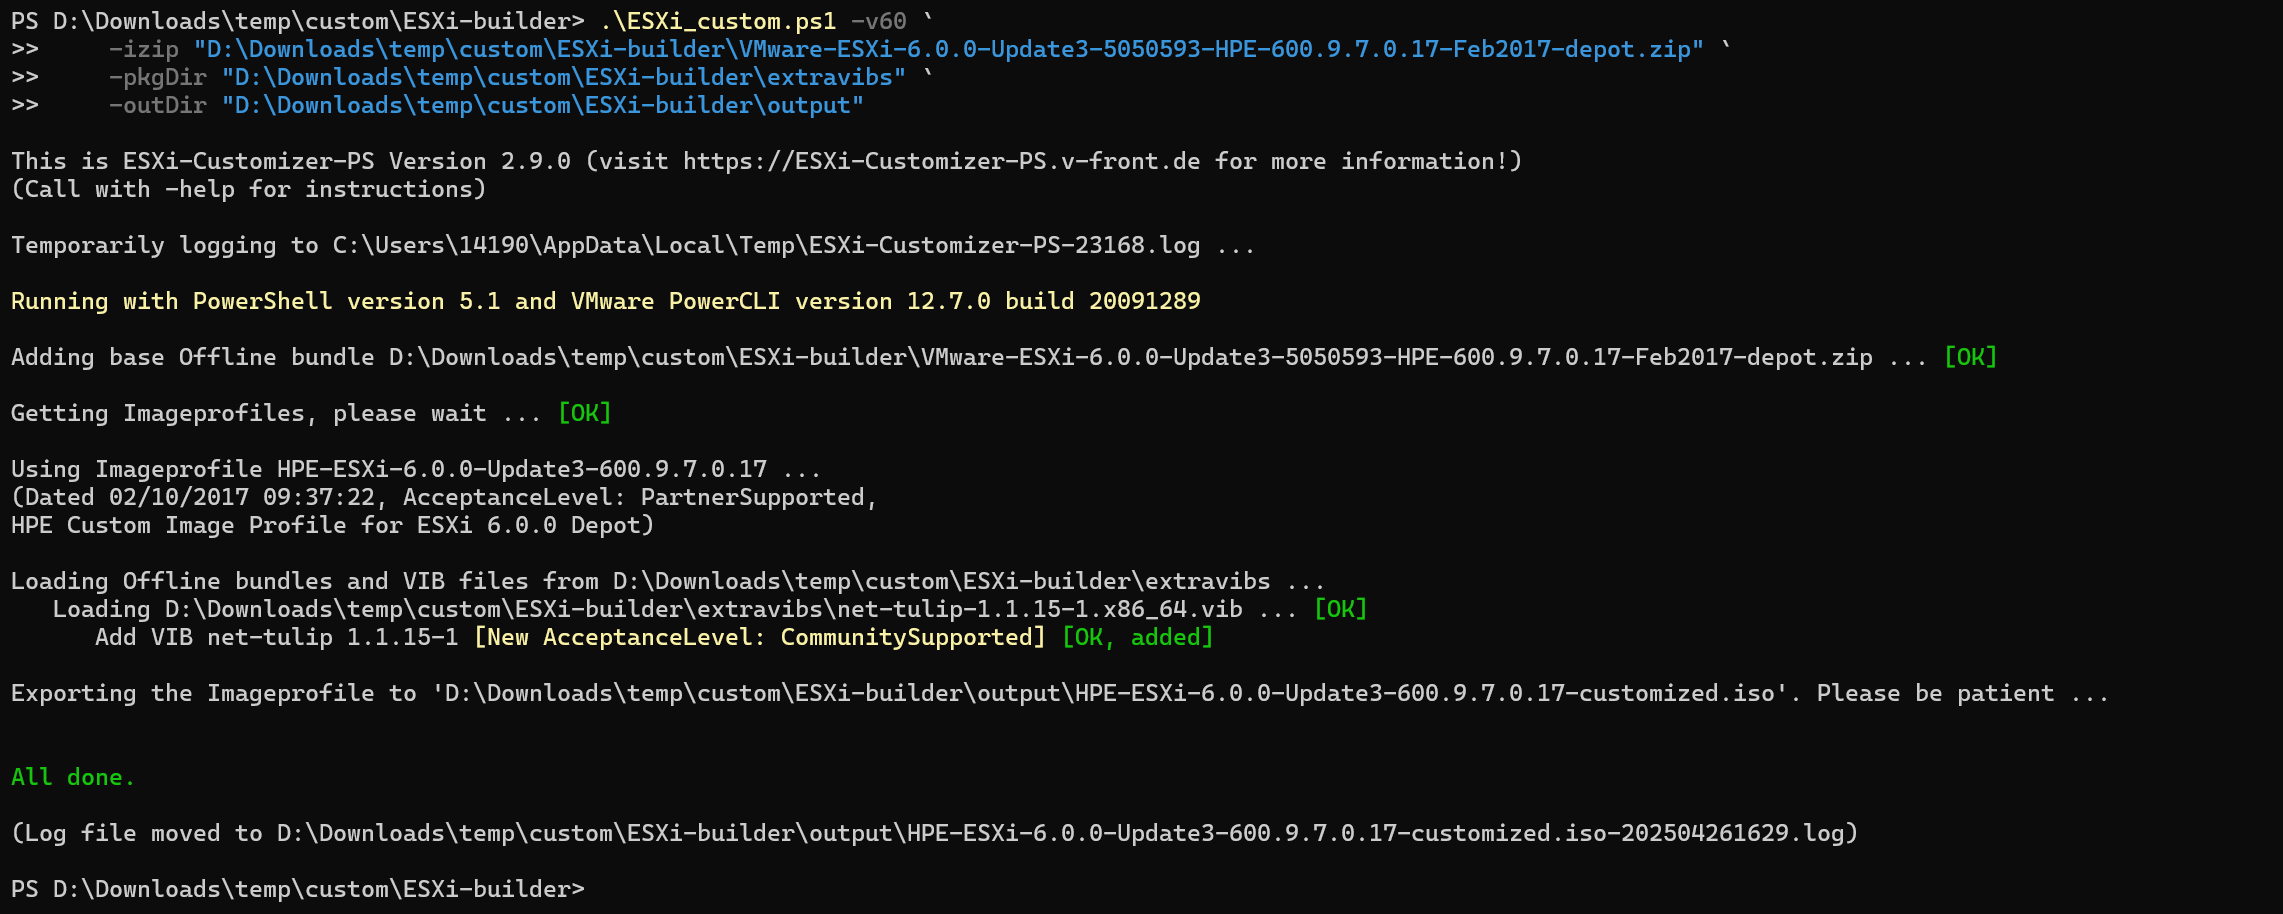
执行ESXi_custom.ps1将net-tulip网卡打包进VMware-ESXI-6.0.0
PS D:\Downloads\temp\custom\ESXi-builder> .\ESXi_custom.ps1 -v60 `
    -izip "D:\Downloads\temp\custom\ESXi-builder\VMware-ESXi-6.0.0-Update3-5050593-HPE-600.9.7.0.17-Feb2017-depot.zip" `
    -pkgDir "D:\Downloads\temp\custom\ESXi-builder\extravibs" `
    -outDir "D:\Downloads\temp\custom\ESXi-builder\output"
之后可以在output看到已经打包好的iso了。

安装ESXi
这里的流程同https://www.nakivo.com/blog/install-esxi-hyper-v/大同小异,建议参考原文,我这里简述关键点。
新建虚拟机
注意,Hyperv-V中新建虚拟机时这里需要选Generation 1这种虚拟机,因为只有这样才能使用Legacy Network Adapater,以便用上我们刚刚打包进去的net-tulip驱动

Installation Options选择我们刚刚打包好的iso

其他默认就可以了,

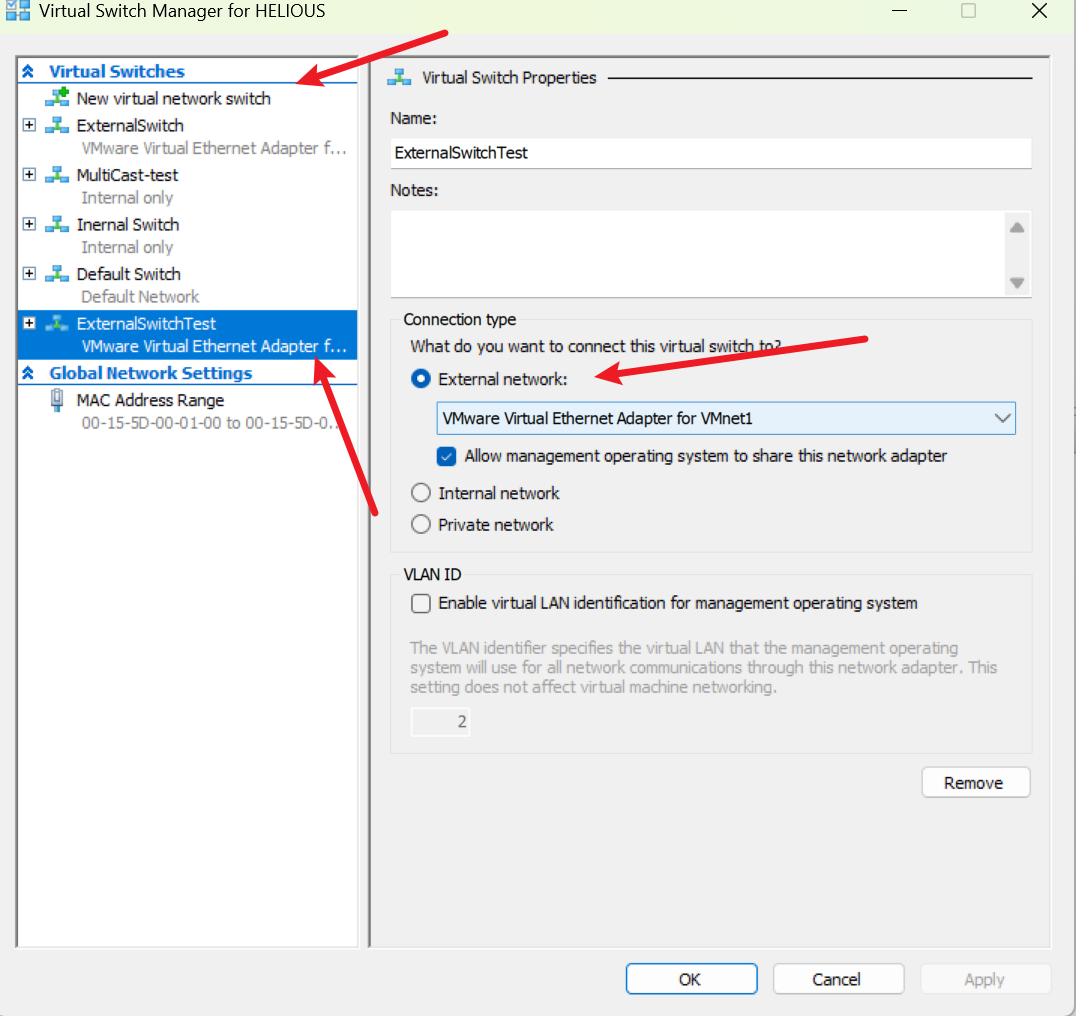
配置网卡
这里需要选一个ExternalSwitch,ExternalSwitch我这里选的VMware WorkStation虚拟出来的网卡,

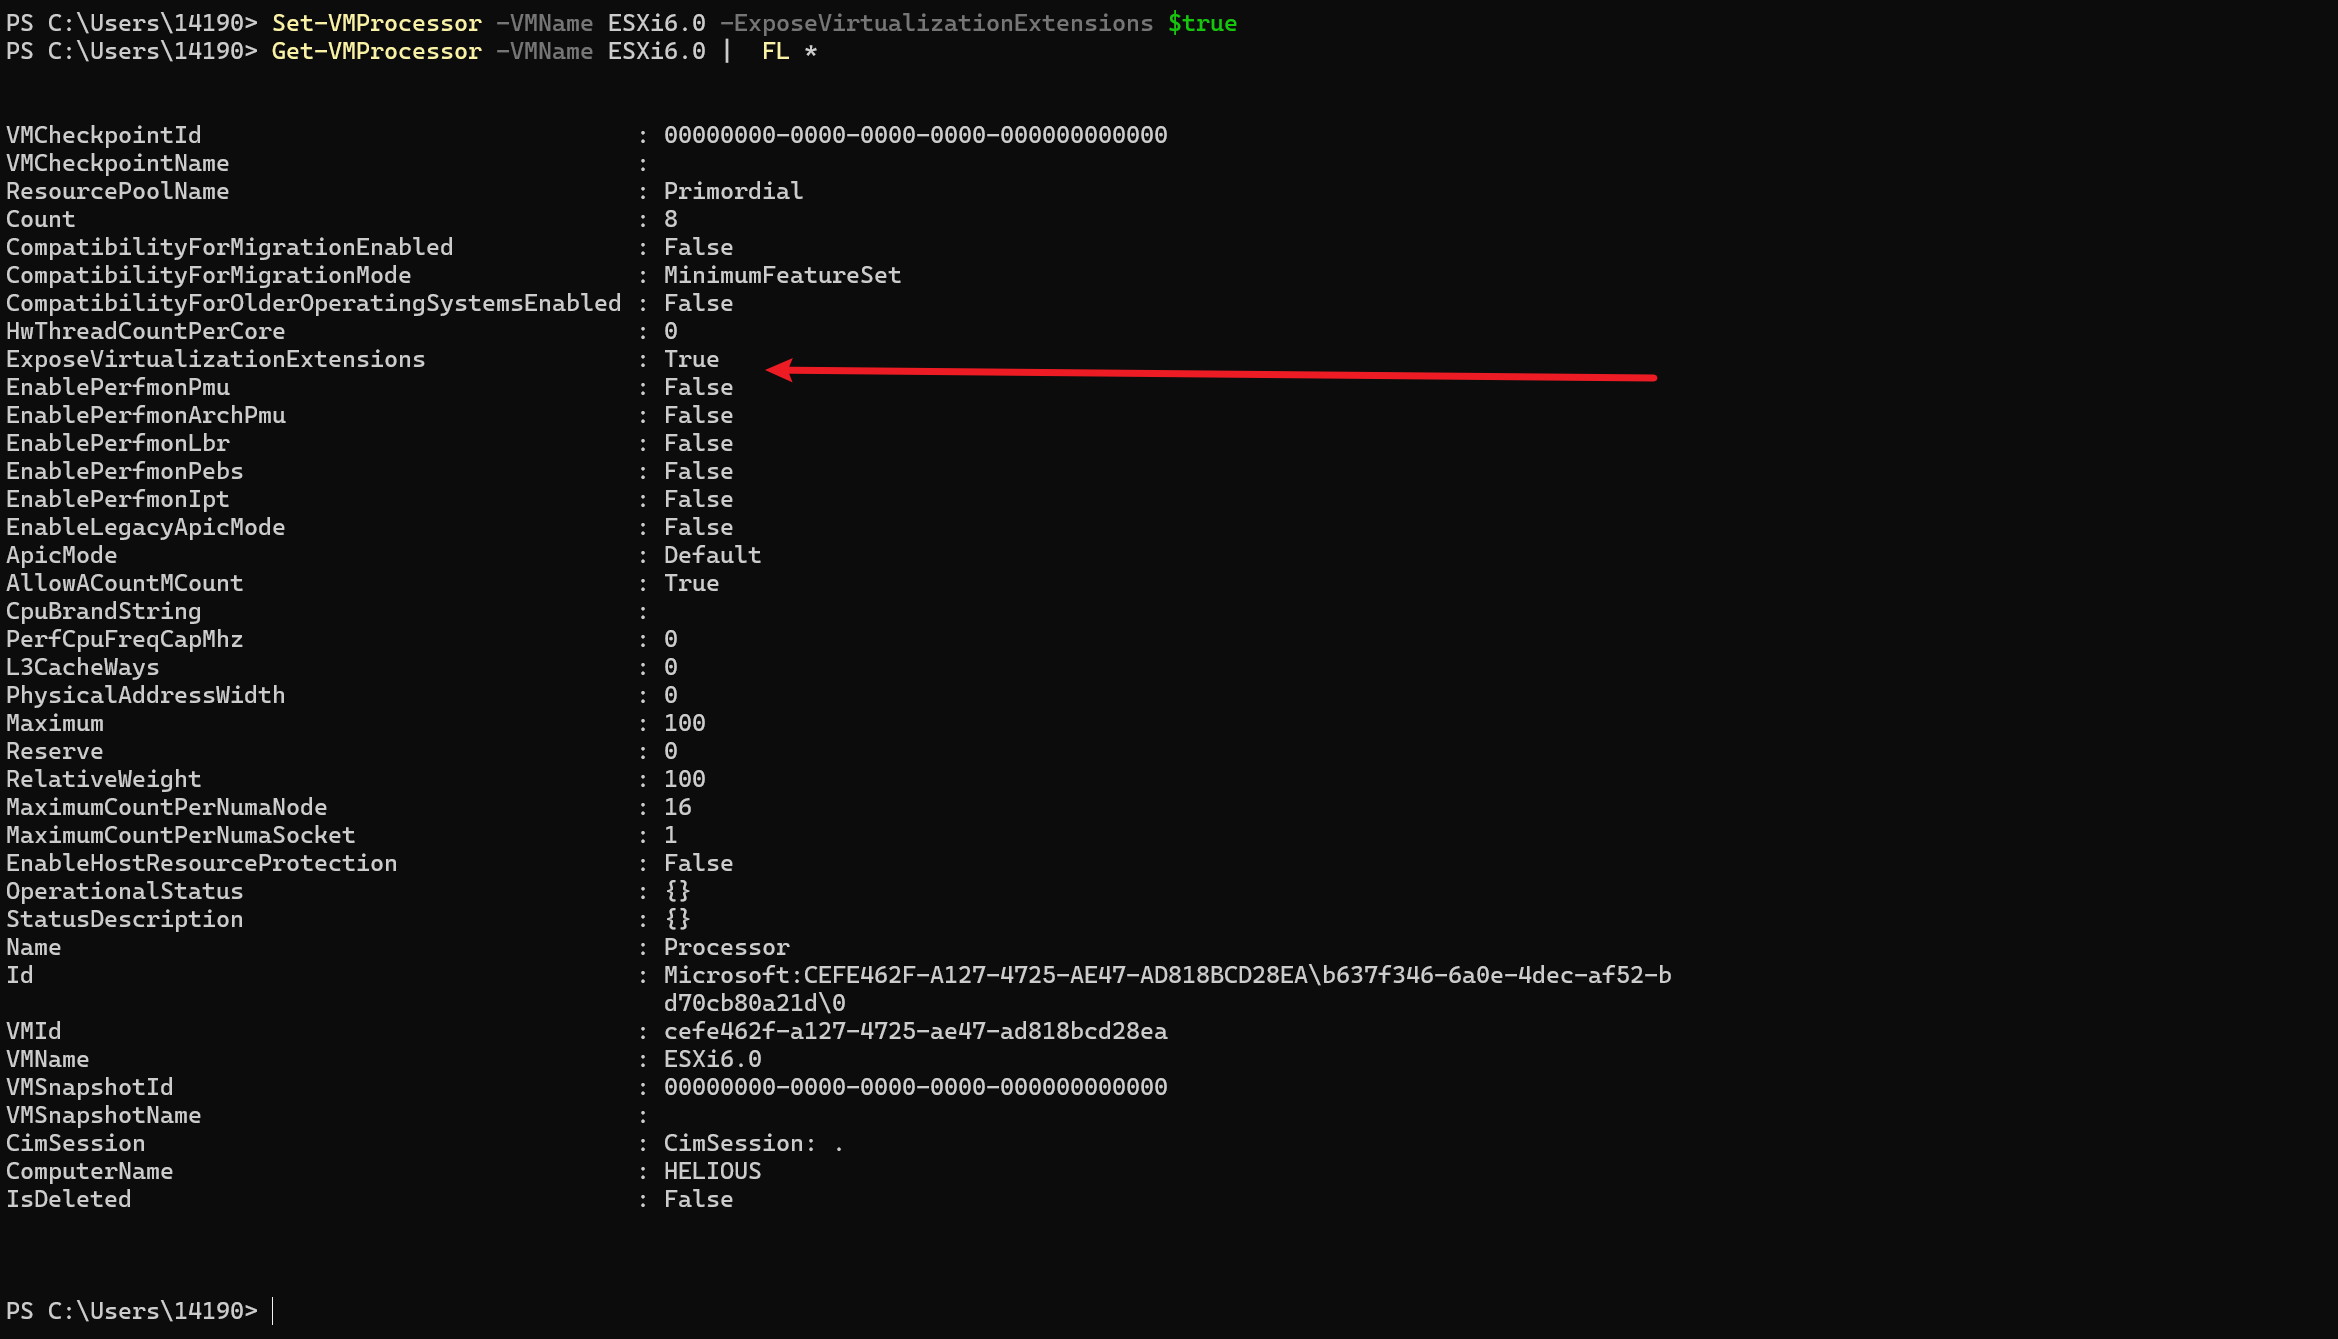
然后我们给这台虚拟机设置允许嵌套虚拟化
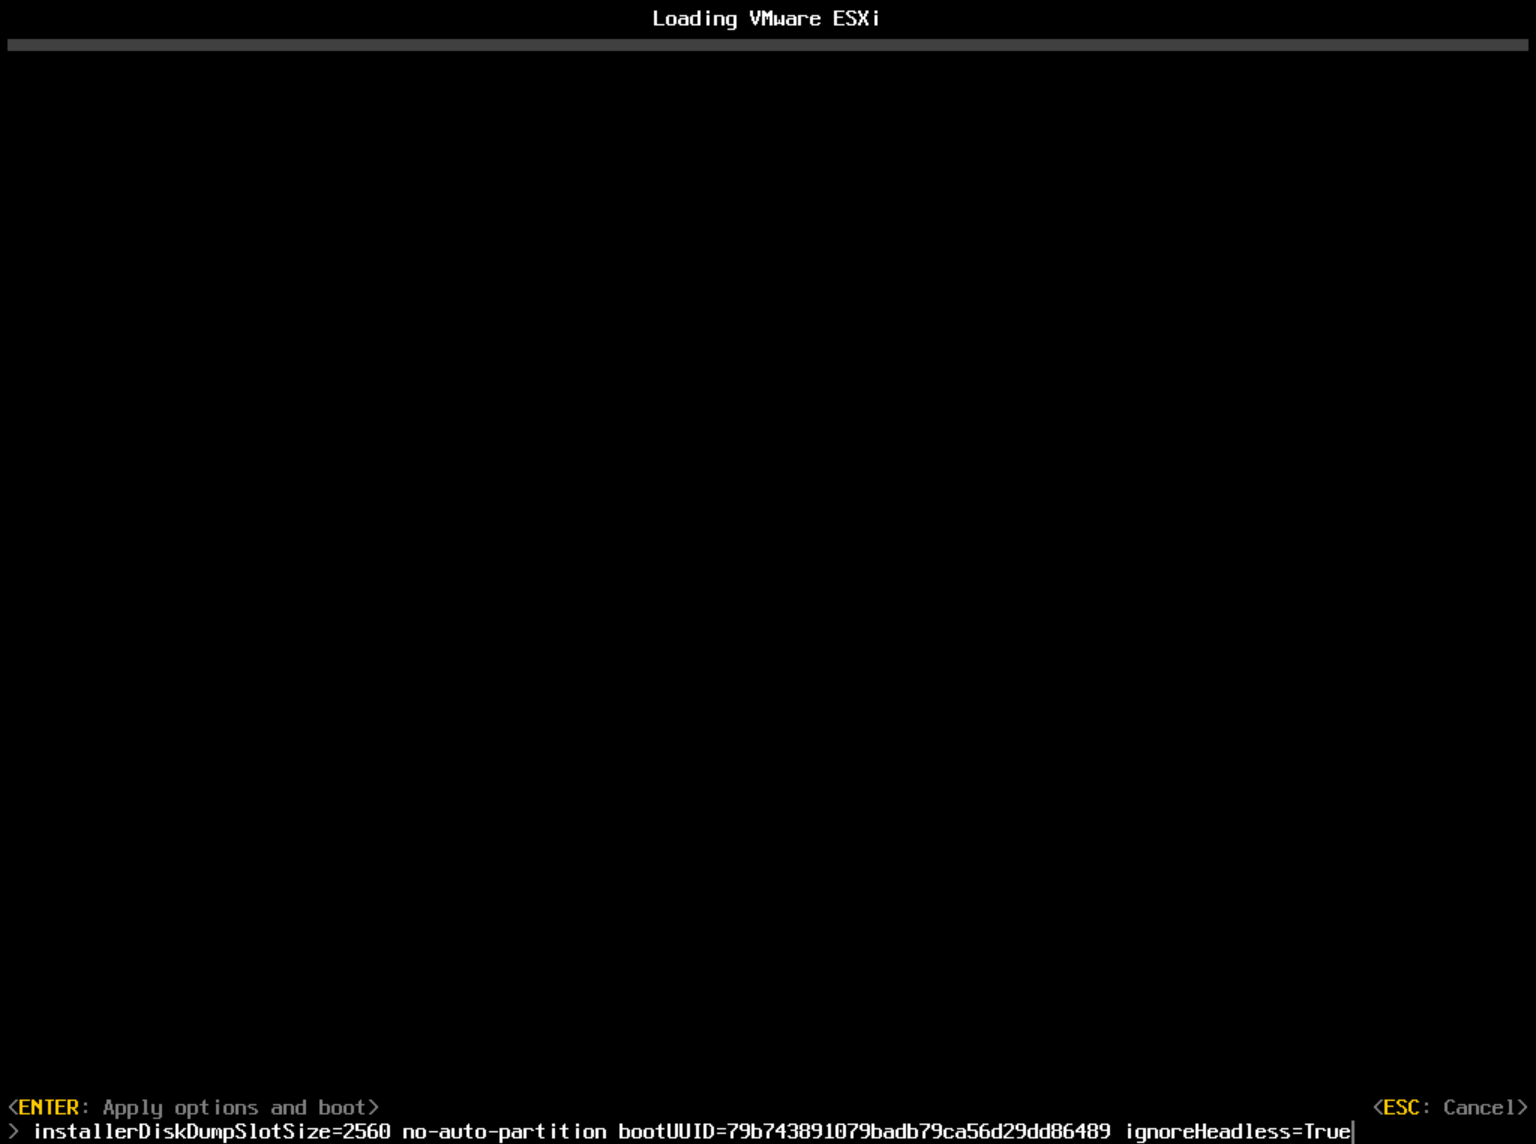
开机按tab键,加上ignoreHeadless=True

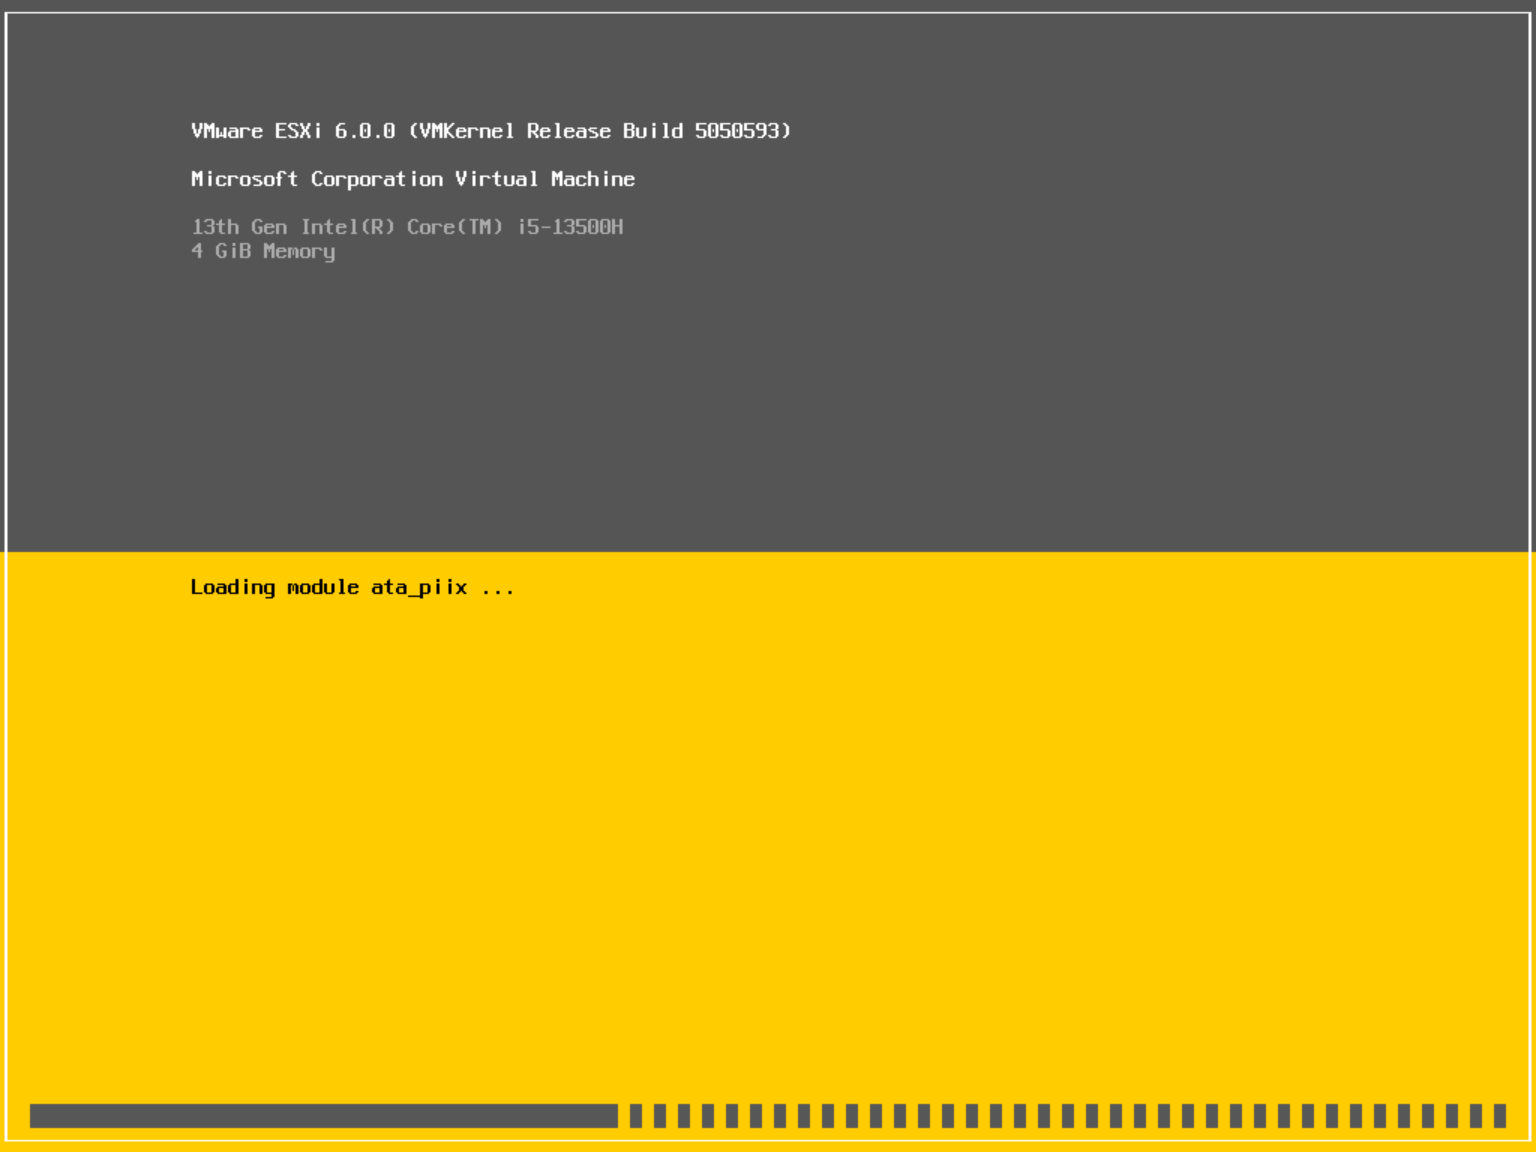
剩下就一直等待初始化
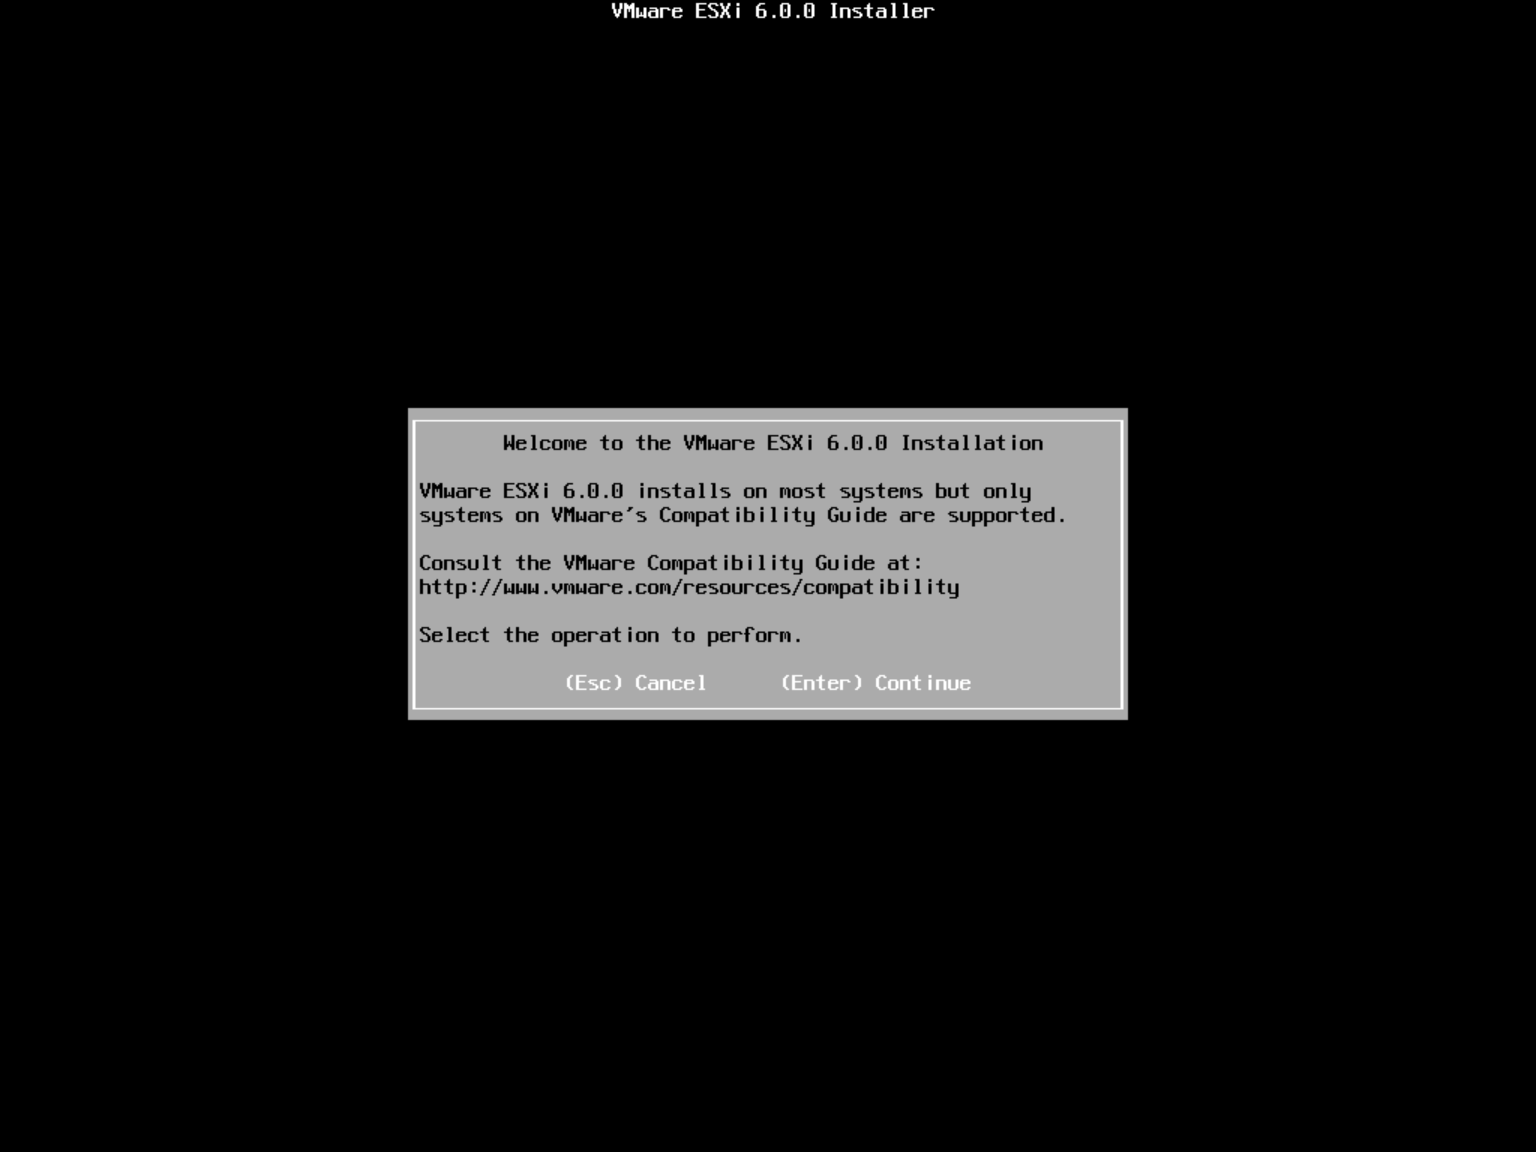
初始化完成后,就根据指引继续安装,注意看提示按哪些键

安装完了,我们要让他重启下

重启时,我们按shift + o还是需要加上ignoreHeadless=True
然后应该会进入这个界面

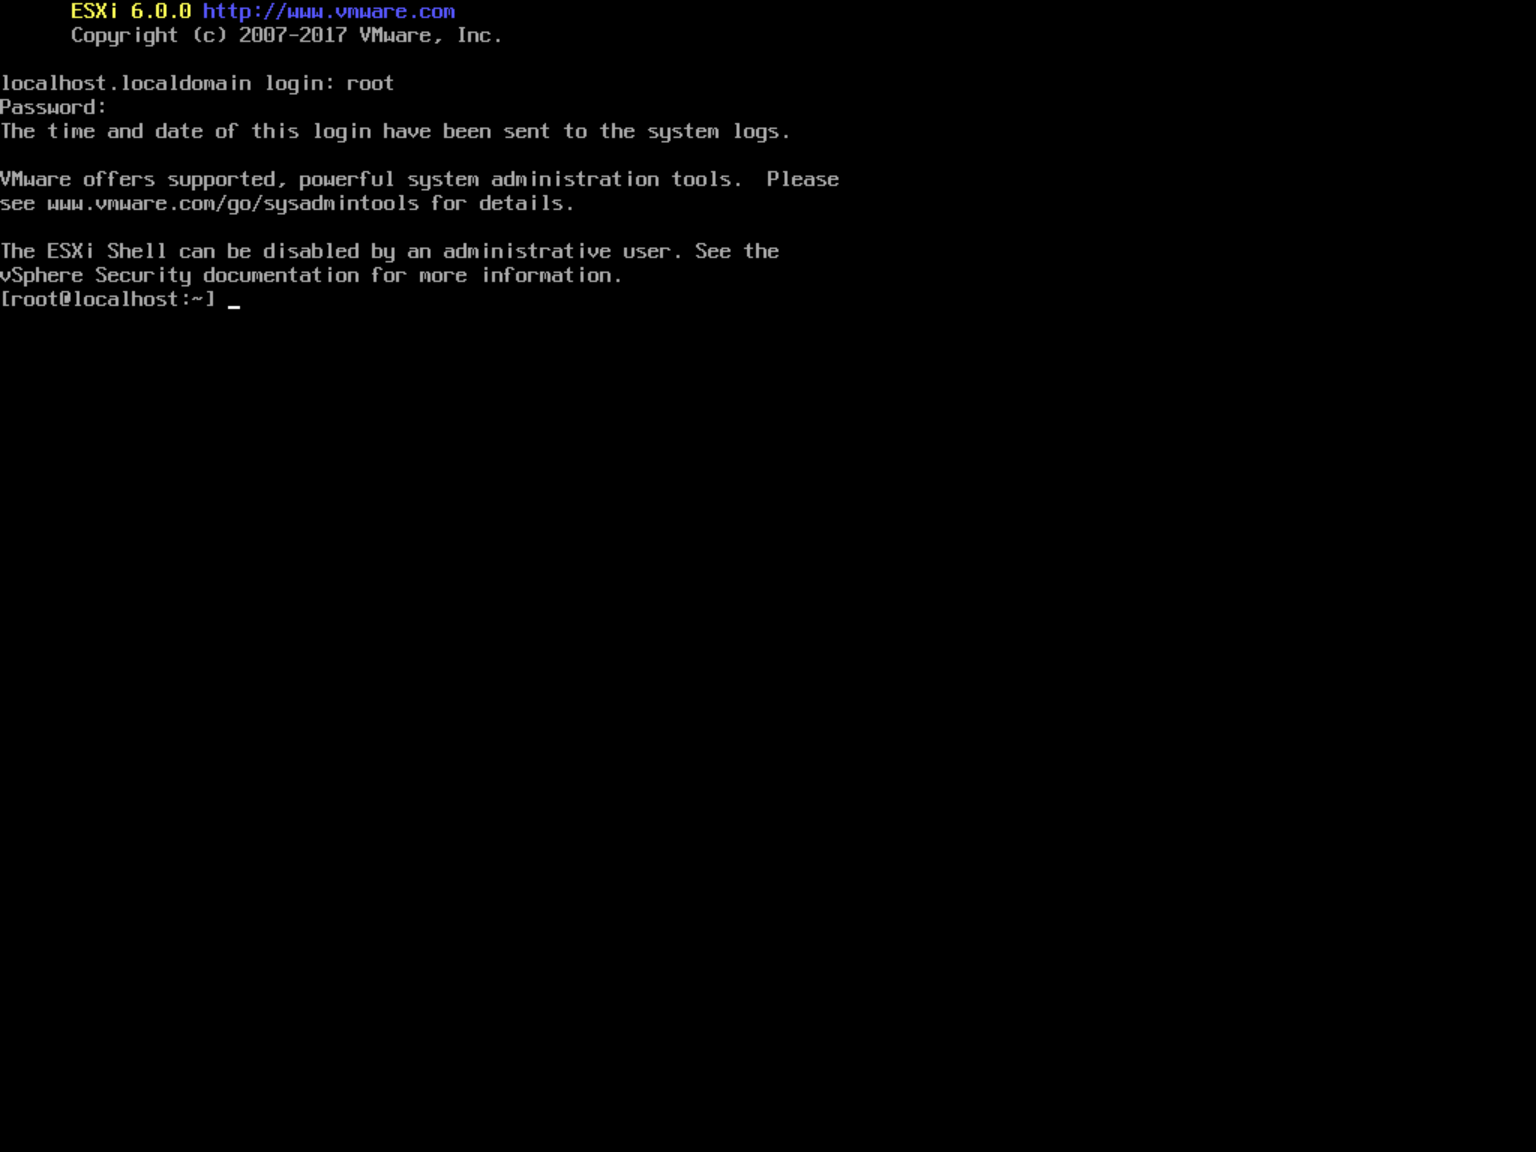
按F2进入控制台

输入密码后再按F2

进Troubleshooting Mode Options把SSH和后台的Shell打开


回到控制台后,按ALT+F1进入后台
设置kernel启动参数,这样就不用每次启动都进命令行加启动参数了
esxcfg-advcfg -k TRUE ignoreHeadless

访问控制台
通过ipv6 link local address访问
我们可以在控制台配置网络,但我这边不管怎么配ipv4的地址总是ping不通(本地抓包发现ESXi arp能发不能收包,具体原因没查出来)。但是ipv6的地址可以ping通,我们就用ipv6来访问吧。
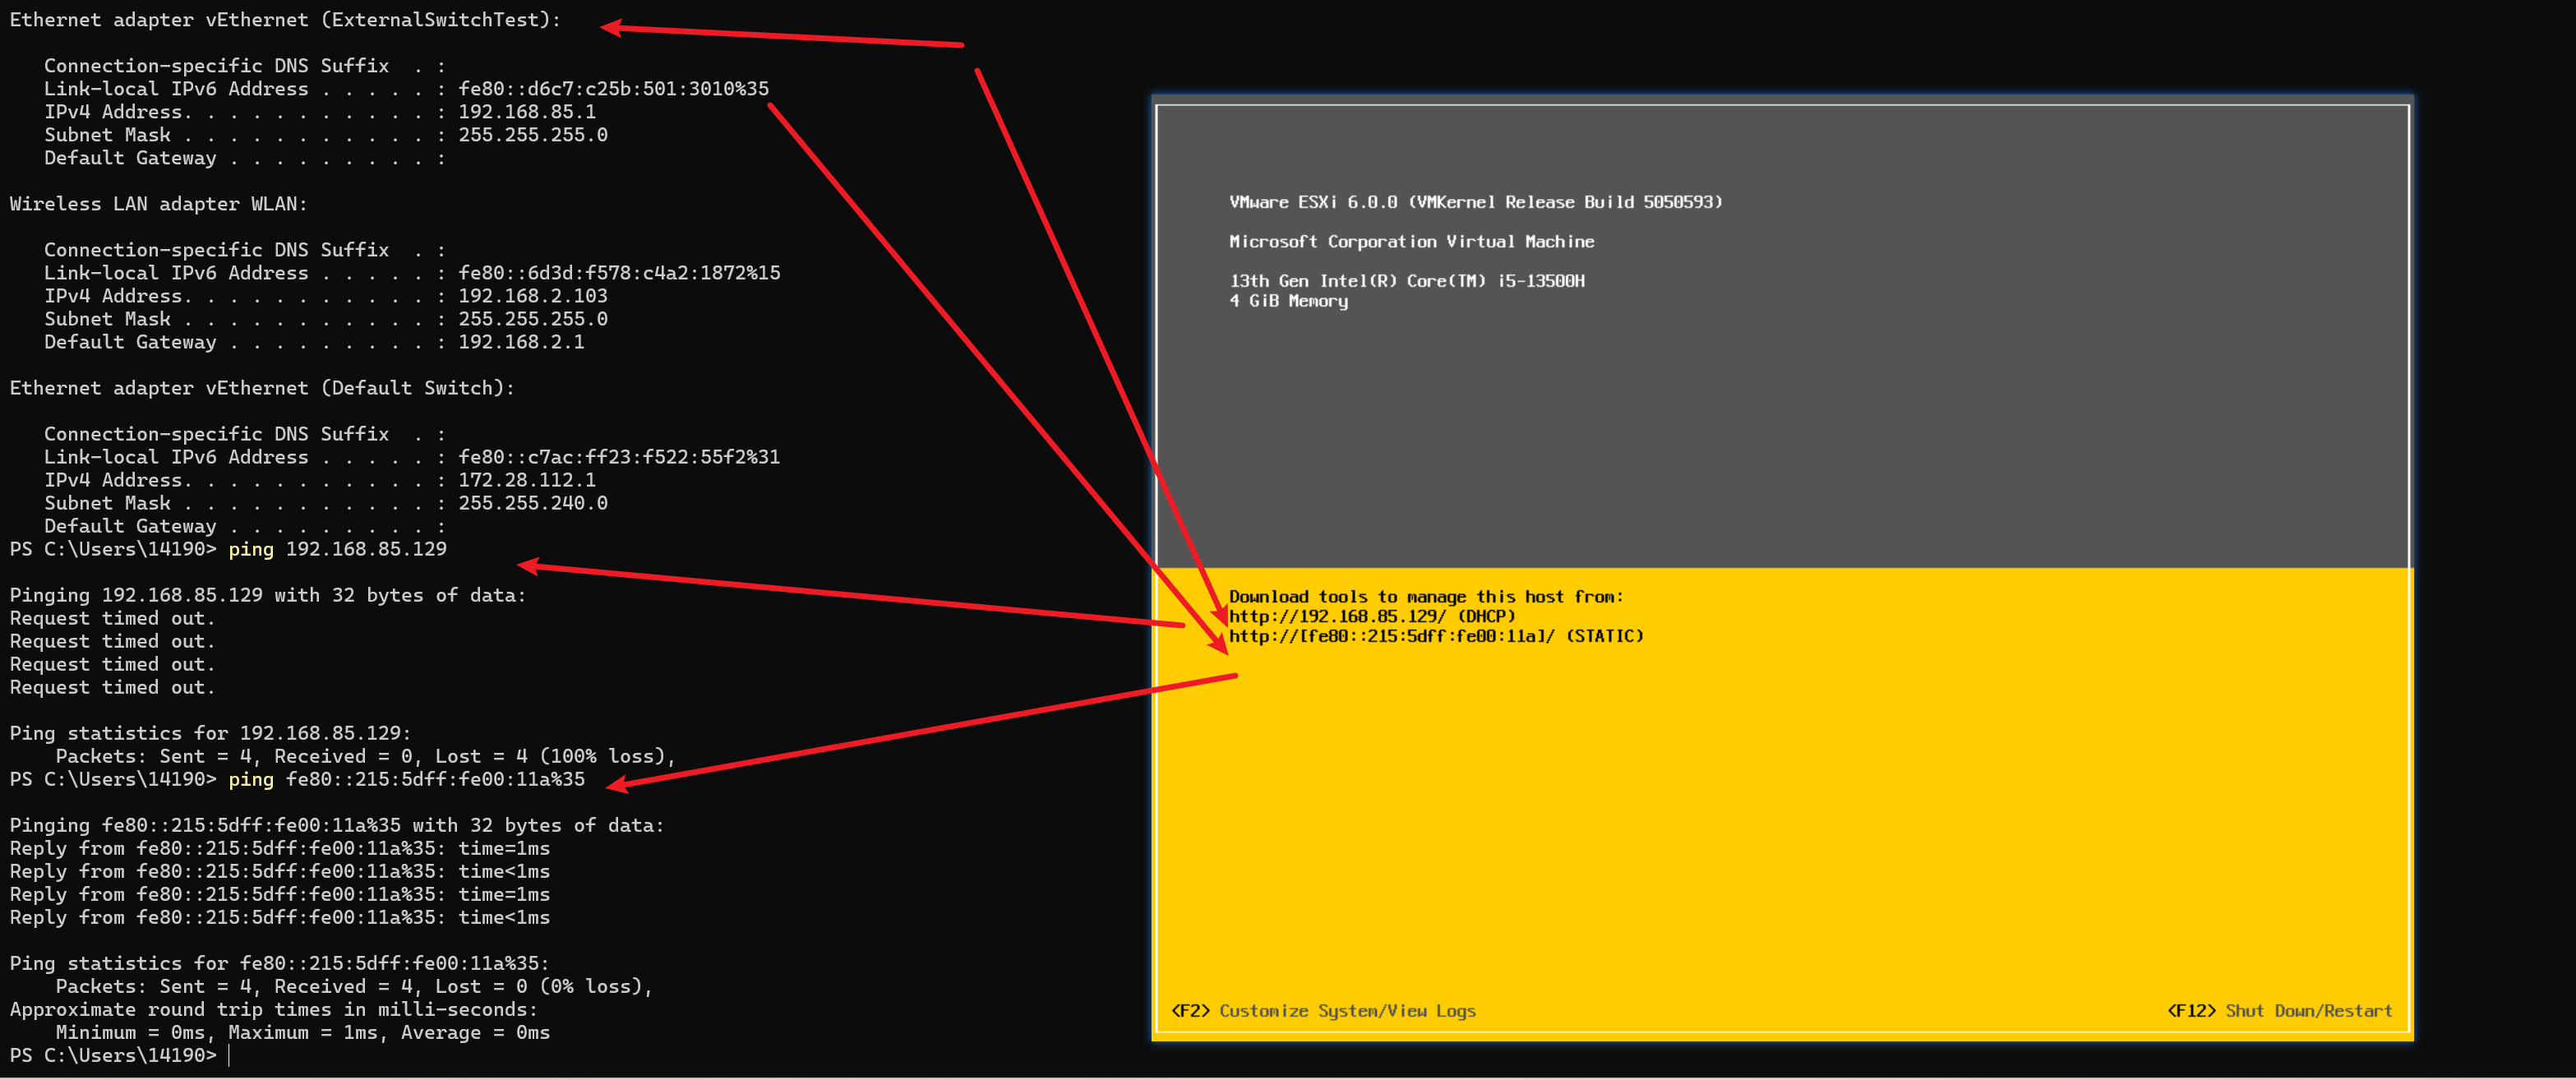
注意:fe80::开头的ip地址是一个link-local地址,而这个地址目前浏览器都不支持解析,所以我们没法直接访问vsphere web client.
但根据这里的方法,我们可以通过代理的形式,将网址替换为一个域名让浏览器解析
The prettysocks SOCKS5 proxy (update 2021-11-24)
On 2021-11-23 we have been notified that there is a new workaround available: prettysock is a Socks5 proxy written in python that allows the use of Microsoft’s ipv6-literal.net domain, but from any OS or browser, which is pointed to the proxy. So to access fe80::1ff:fe23:4567:890a%3, configure your browser to use the local prettysocks Socks5 proxy, replace the link local address with fe80–1ff-fe23-4567-890as3.ipv6-literal.net and there you go.
There are two interesting things to say about this solution:
- It is a very simple solution
- It is surprising that browser vendors haven’t implement such a simple solution themselves so far – does it need an RFC that defines the domain to be used?
GPT翻译后的解释

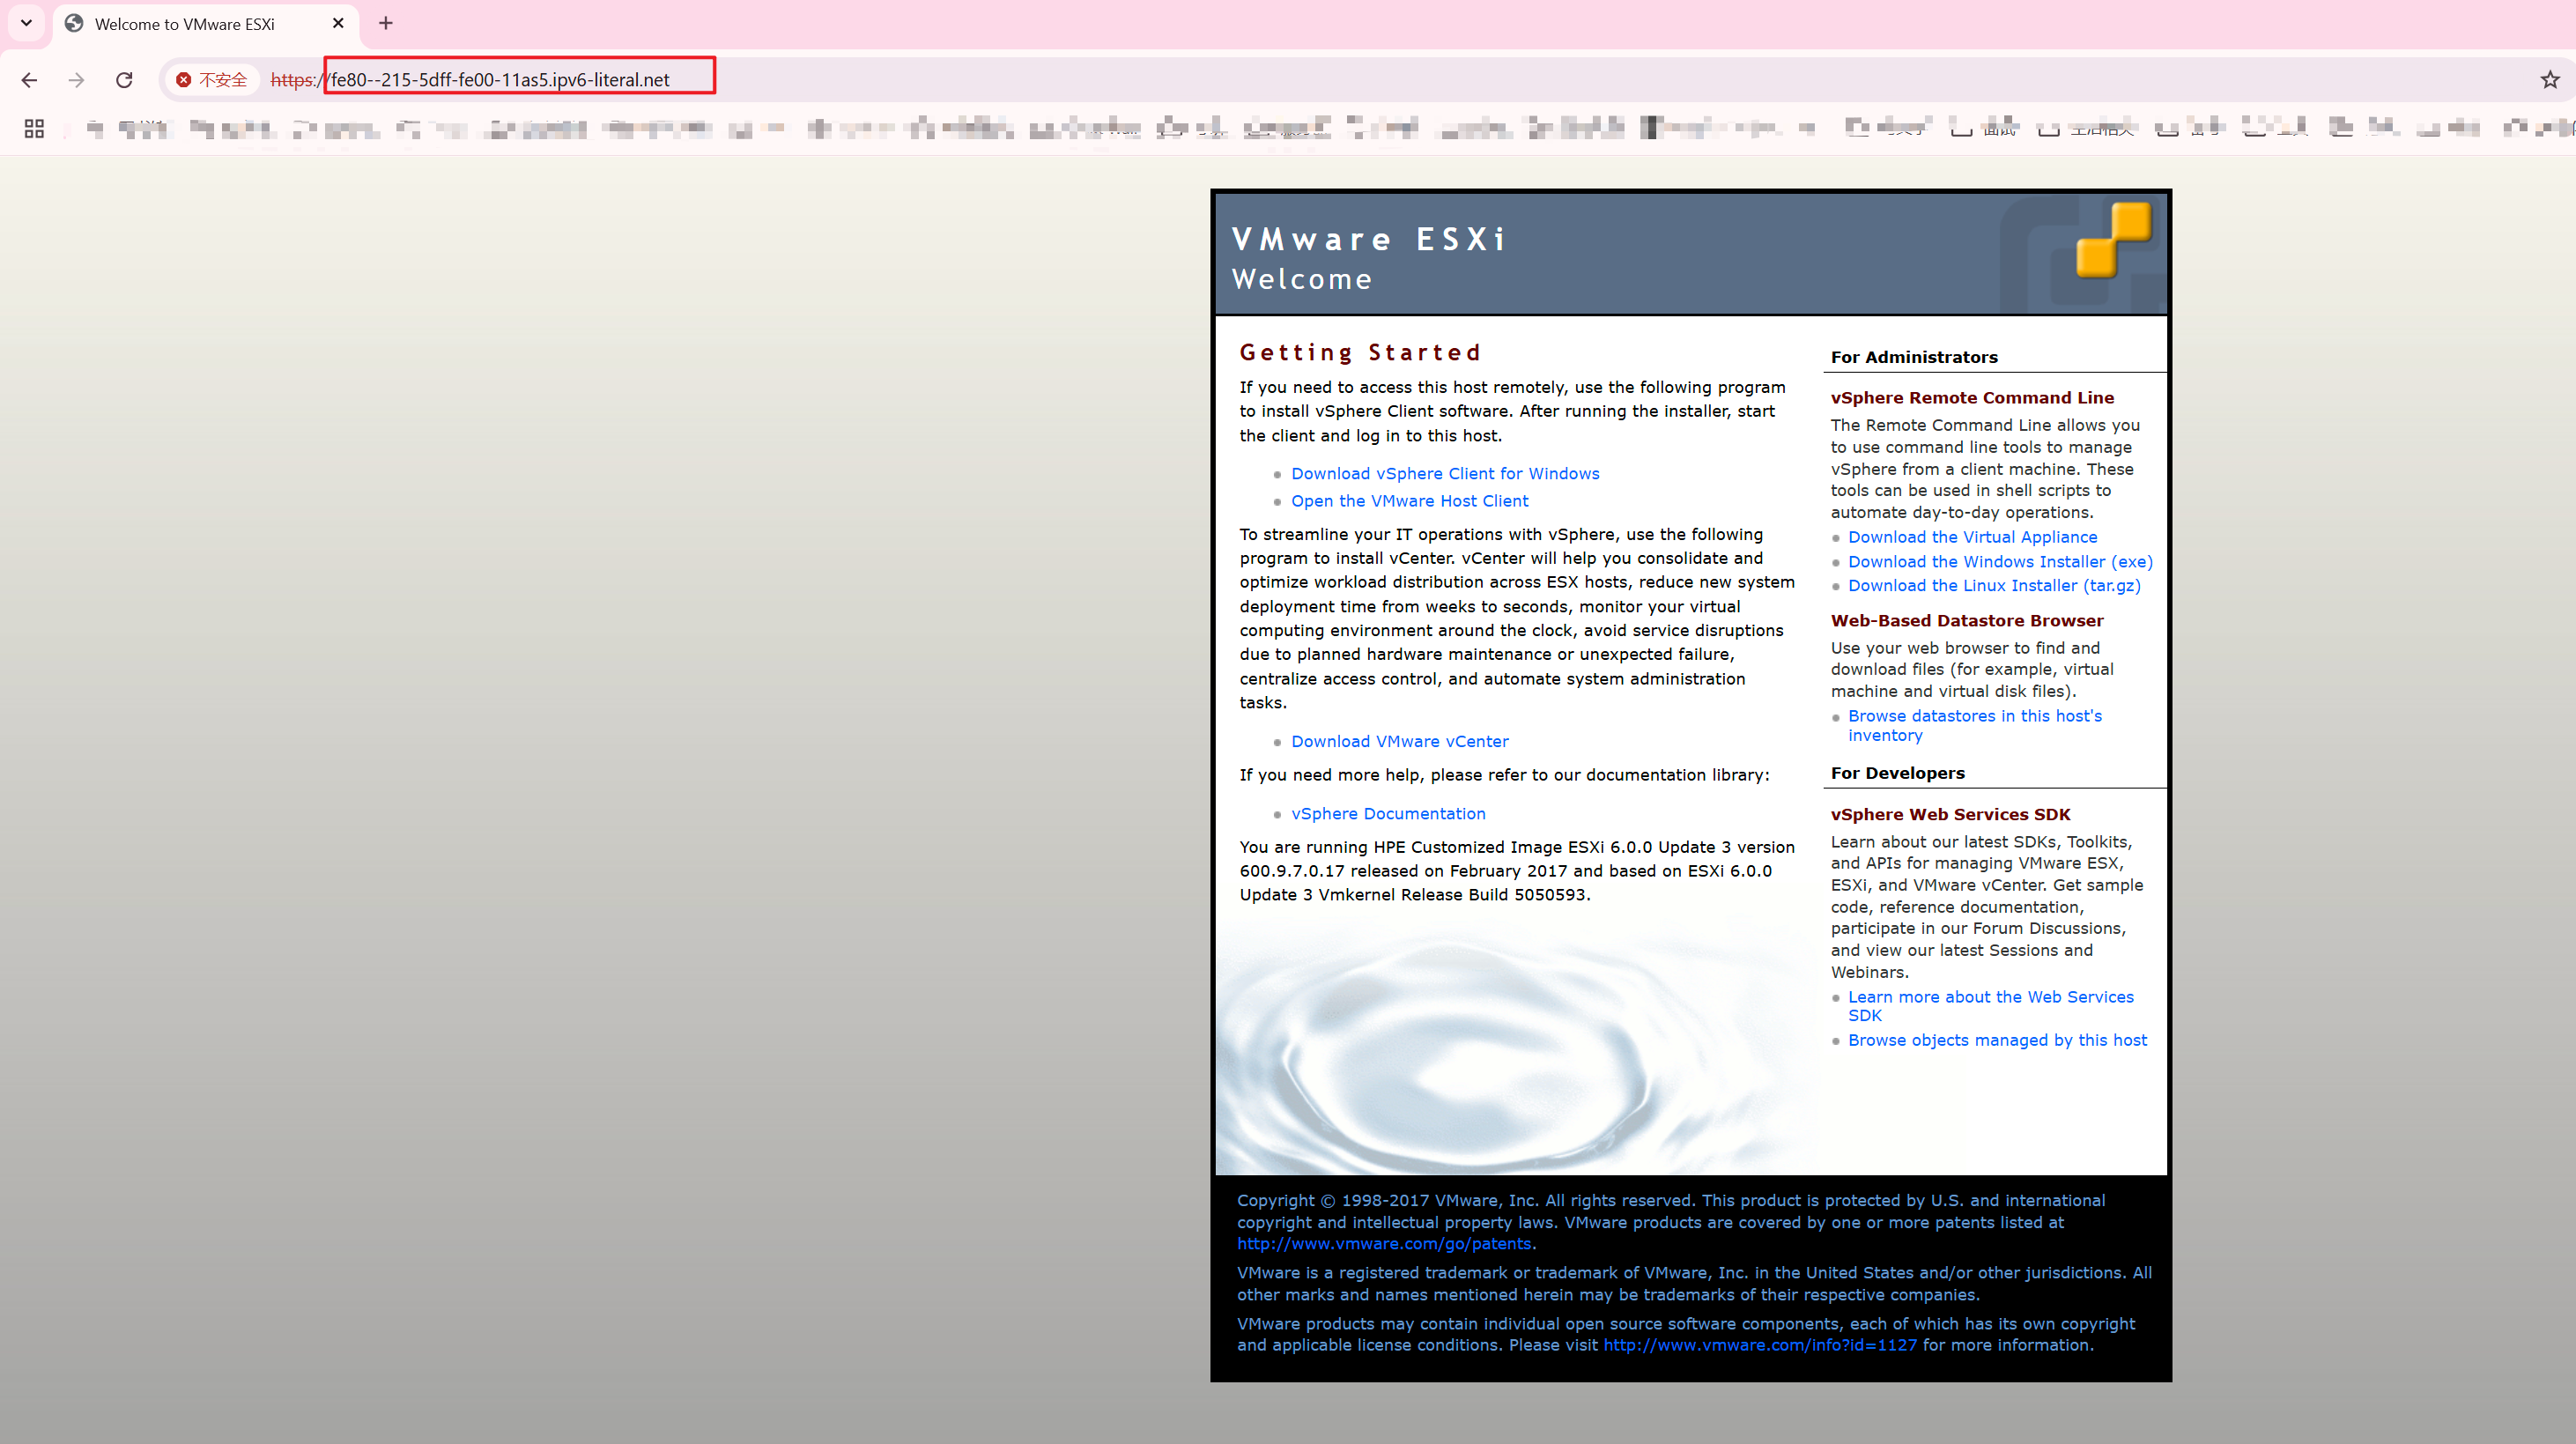
ok,根据上述方法,我们通过在浏览器插件SwitchOmageProxy设置规则,


注意看网址


但我们可以用vsphere client是可以解析ipv6 link-local地址的,所以可以用vsphere client来管理

这里不知道为啥,如果我不进入web页面,证书install后,这里vsphere client始终进不去。但我进了web页面后这里也能进去了。
但vshpere client本来在6.5之后的版本就处于一种废弃的状态,且功能不如web client丰富,要么用vcenter server。要么用web client
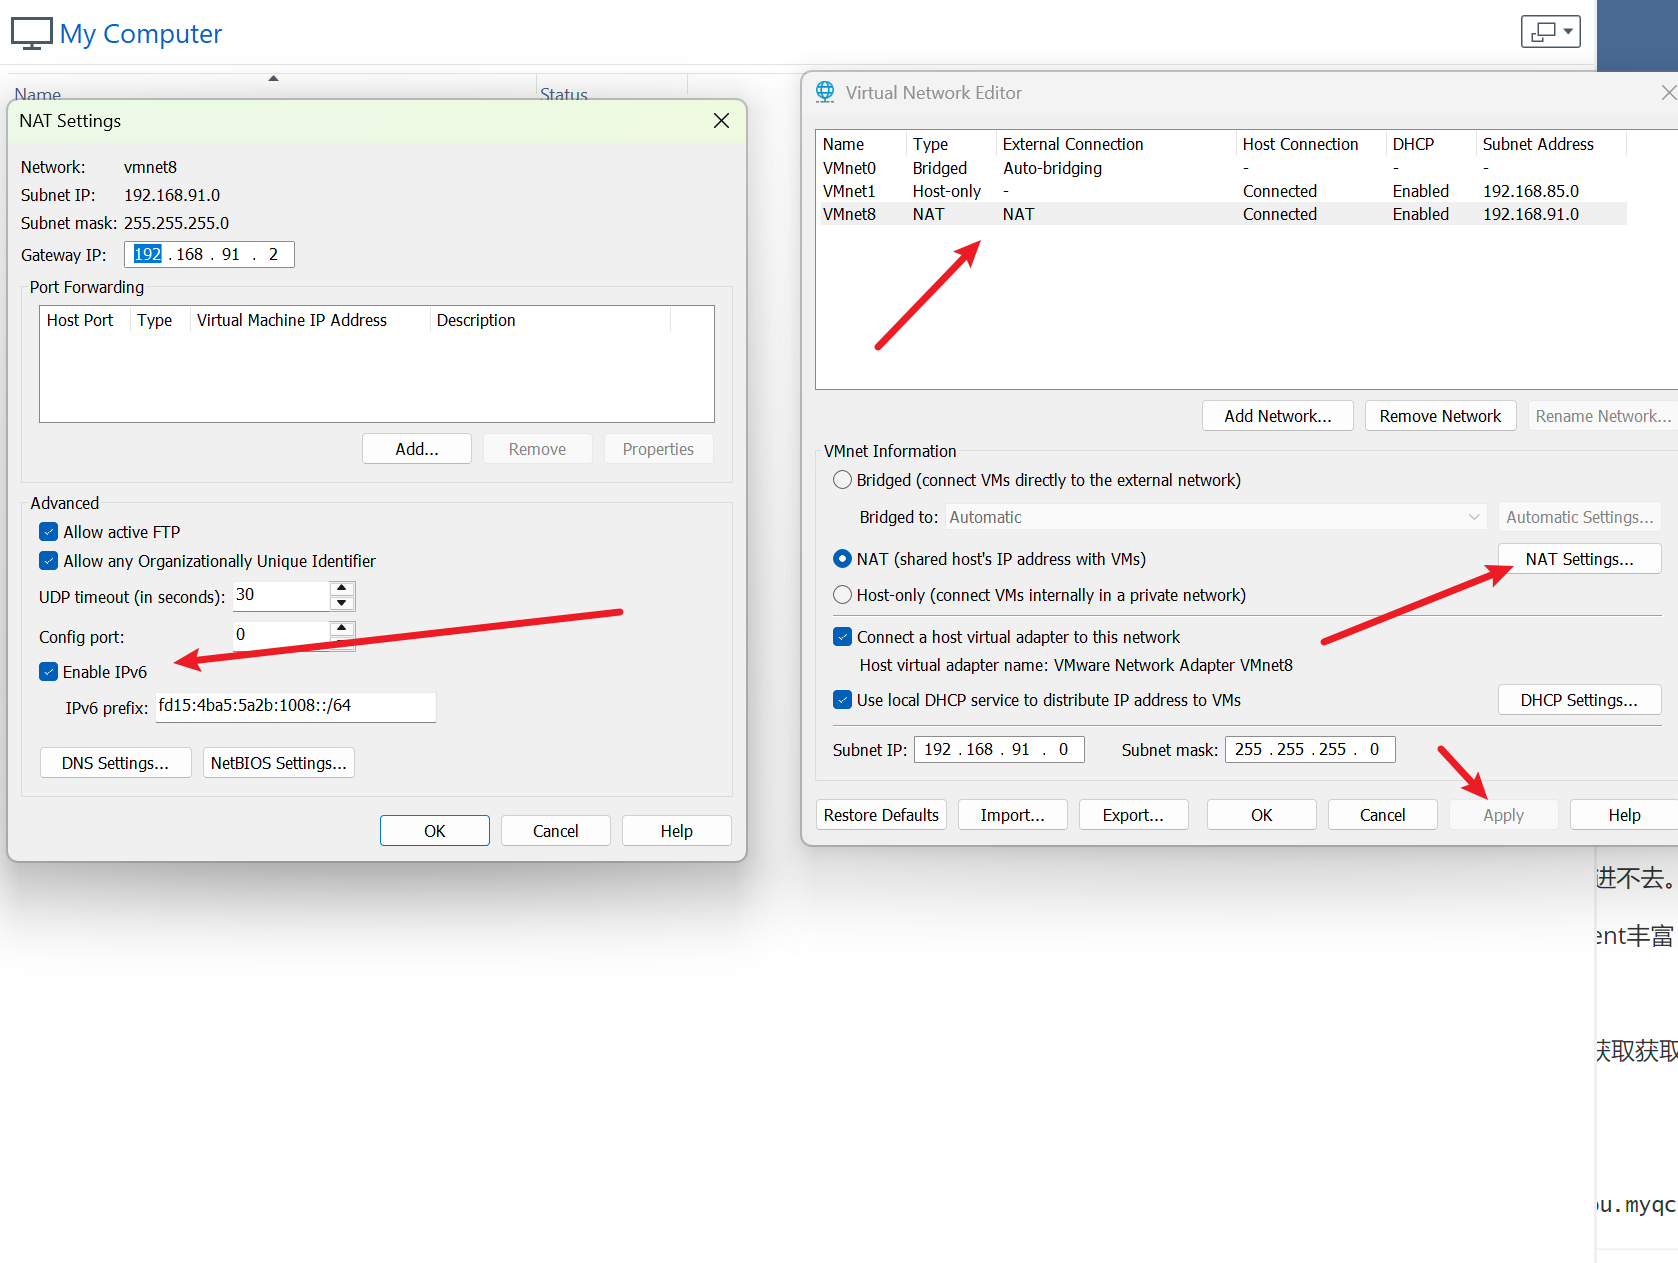
通过从DHCPv6获得ULA ipv6地址访问
如果不想这么麻烦,也可以直接进后台把ipv6 的dhcp和auto-conf打开,这样就能自动从DHCPv6获取到一个ULA的ipv6地址。可以直接用这个地址访问,前提是你的ExternalSwitch可以有DHCPv6。
巧合的是VMware创建的NAT模式的虚拟网卡可以分配ipv6地址

然后我们进ESXi后台开启ipv6的dhcpv6及自动协商
esxcli network ip interface ipv6 set -i vmk0 --enable-dhcpv6=true --enable-router-adv=true
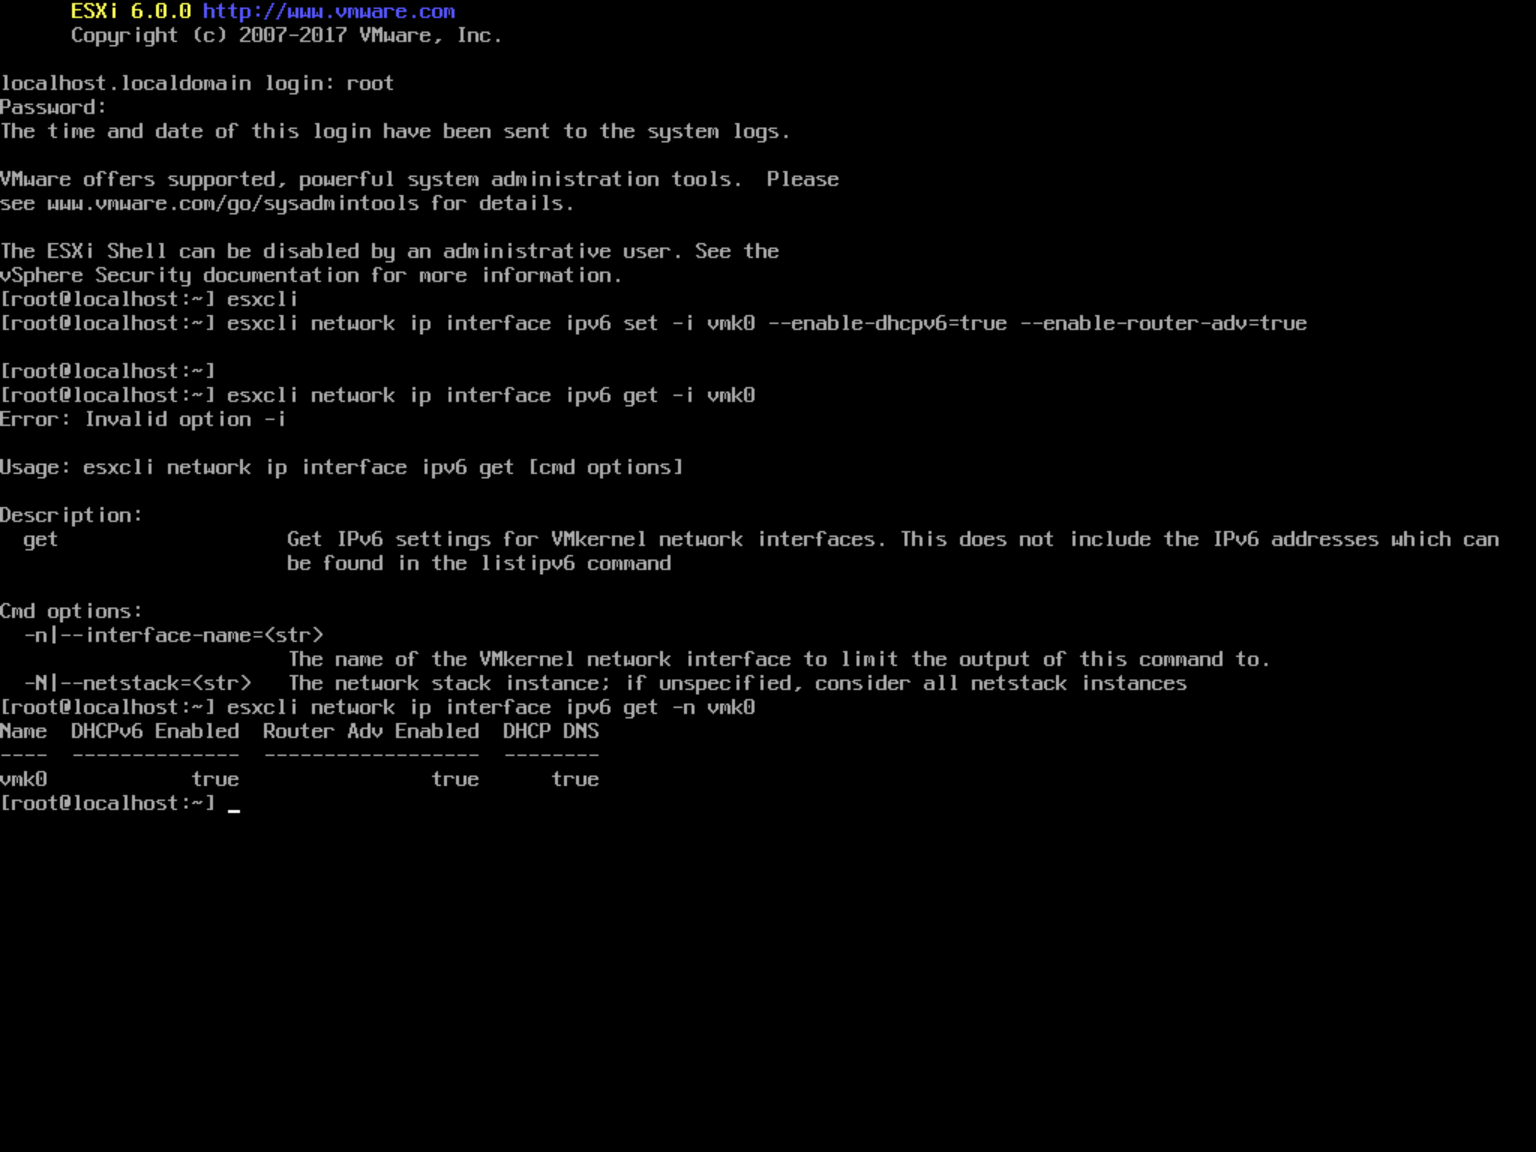
我们还是通过代理的方式进web控制台,可以看到启用后,就自动分配了ipv6地址了

现在我们用这个ULA地址访问web client试试。
注意,ipv6的地址我们要用这个格式 http://[ your_ipv6_address]

ok,到这里就算结束了
激活License
你如果把前面的流程都跑通了,这个问题应该也难不倒你…
安装vCenter Server
todo
后记
折腾这件事的主要起因是最近在看《vSphere 6.5 Host Resources Deep Dive》这本书,觉得没有环境,看起来总像空中楼阁,前前后后花了一周时间才搞定吧。
这这里填最折腾的就是发现ipv4的地址无论如何都无法ping通,从Host发进来的ARP Reply包进了ESXi后似乎就丢了,肯定哪里有bug。
但我的目标,是能够使用ESXi,既然最终能通过访问ipv6访问,那上面这个没查出来就不浪费时间了吧(大概率我也查不出来)
发现ipv6能访问,是根据这里的提示了解到的
- AFAIK, The only working network switch is the
external switch, which will not allow host to vm connections when you only have one nic. See https://serverfault.com/questions/984241/hyper-v-connecting-to-host-to-vm-w-external-switch. But you can access your esxi vm viaIPv6instead in that case.
以及这里的之所以只能使用ESXi6.0及以下版本,是因为网卡net-tulip在更高(20170604后)版本被禁了。
如果买了ESXi兼容的网卡,可以通过Hyper-V的直通能力,将网卡直通进去,也就没这些乱七八糟的问题了,但这一点,我暂时是没时间去研究了。
参考链接
- https://github.com/sinloss/ESXiV
- https://www.nakivo.com/blog/install-esxi-hyper-v/
- https://vibsdepot.v-front.de/wiki/index.php/Net-tulip
- https://github.com/VFrontDe-Org/ESXi-Customizer-PS
- https://within592.rssing.com/chan-21128804/latest.php
- https://mirror.mahanserver.net/?dir=VMware/ESXI/6.0.0
- https://staticcms.k8s.ungleich.ch/u/blog/ipv6-link-local-support-in-browsers/
- https://web.archive.org/web/20190707131225/https://communities.vmware.com/thread/427502
- https://frankdenneman.nl/2017/11/07/free-vsphere-6-5-host-resources-deep-dive-ebook/
- https://dscottraynsford.wordpress.com/2016/04/22/install-a-vmware-esxi-6-0-hypervisor-in-a-hyper-v-vm/comment-page-2/